


Setting Sub-user Permissions
Permissions determine what a sub-user can access and do within the platform, including specific modules, features, and projects. By assigning the appropriate permissions and access rules, you can control each sub-user’s level of access, improve security, and ensure team members can only perform actions relevant to their role.
Permissions are only half of access control. They decide what a user can open; Data Visibility Rules decide what they can see inside what they open. See Data Visibility Rules for Sub-Users for the second layer.
Accessing Sub-user Permissions
- To access User Management, click your Account Initials in the top-right corner and select Account Settings → User Management. Alternatively, click Account Settings at the bottom of the left-hand menu on the Home Page, then select User Management.
- On the User Management page, select the sub-user you want to configure.
- Click Set Permission. This opens the Set Permissions wizard.
- The wizard is organized into two tabs at the top, which together form the two layers of access control for a sub-user:
- Permissions — controls which projects, modules, and features the user can open.
- Data Visibility — controls which records appear inside the items they’re allowed to open. See Data Visibility Rules for Sub-Users.
- Across the top of the Permissions tab, you’ll see a row of sub-tabs — one for each area you can configure: Projects, Directories, Contact Lists, Email Templates, Custom Dashboards, CX Dashboard, EX Dashboard, Saved Reports, Salesforce, File Library, Project Calendar, and Custom Text and Labels.
- Select the area you want to configure, set the access options, and click Save or Save & Go Back. The updated permissions apply to the selected sub-user.
Navigate to
- Permissions for Project
- Permissions for Directory
- Permissions for Contact Lists
- Permissions for Email templates
- Permissions for Custom Dashboards
- Permissions for Saved Reports
- Permissions for Salesforce
- Permissions for File Library
- Permissions for Project Calendar
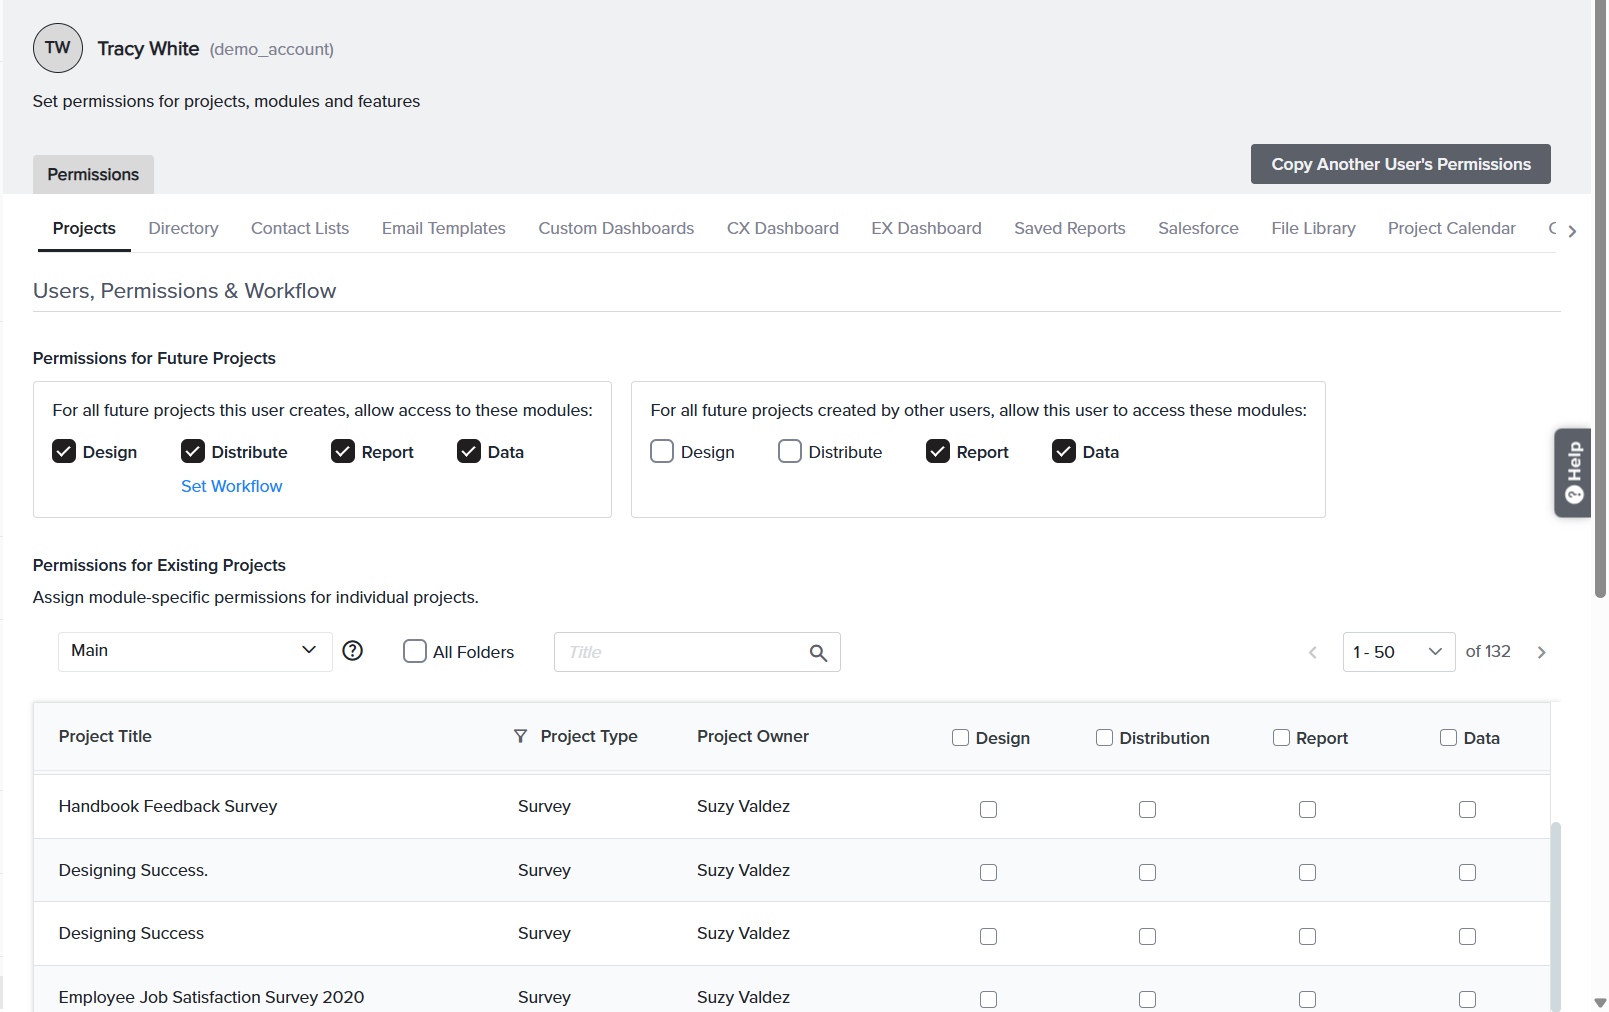
Permissions for Projects
Project permissions determine a sub-user’s access to the Design, Distribution, Report, and Data modules within a project. These permissions are divided into two sections:
- Future Projects – Defines the access that will be assigned automatically to projects created in the future.
- Existing Projects – Defines access for projects that already exist in the account.
Permissions for Future Projects
These permissions are applied automatically whenever a new project is created.
- For all future projects this user creates – Controls which modules the user can access in projects they create themselves.
- For all future projects created by other users – Controls which modules the user can access in projects created by other users in the account.
Permissions for Existing Projects
Use this section to manage access to projects that already exist in the account.
- Select a folder using the Folder dropdown, or enable All Folders to display projects from every folder.
- Use the Search box to locate a specific project by name.
- For each project, select the modules the user should be able to access, including Design, Distribution, Report, and Data.
- To apply the same permission to all displayed projects, use the checkbox in the corresponding column header.
Once you have finished configuring permissions, click Save or Save & Go Back.
A field researcher should build and send surveys but never see raw data. Under Permissions for Future Projects, you check Design and Distribute but leave Report and Data unchecked — so every new survey they create is theirs to design and distribute, with results hidden.
Set Workflow for Distribution
If a sub-user has access to the Distribution module, the account administrator can enable Set Workflow. When enabled, the sub-user must obtain approval from a designated Workflow Manager before distributing a survey. The Workflow Manager receives an email request, and the survey is distributed only after approval is granted.
To learn more about Workflow Management, click here.
New hires shouldn’t email customers without a review. You enable Workflow for Distribution on their account, so every send pauses for a manager’s approval first.
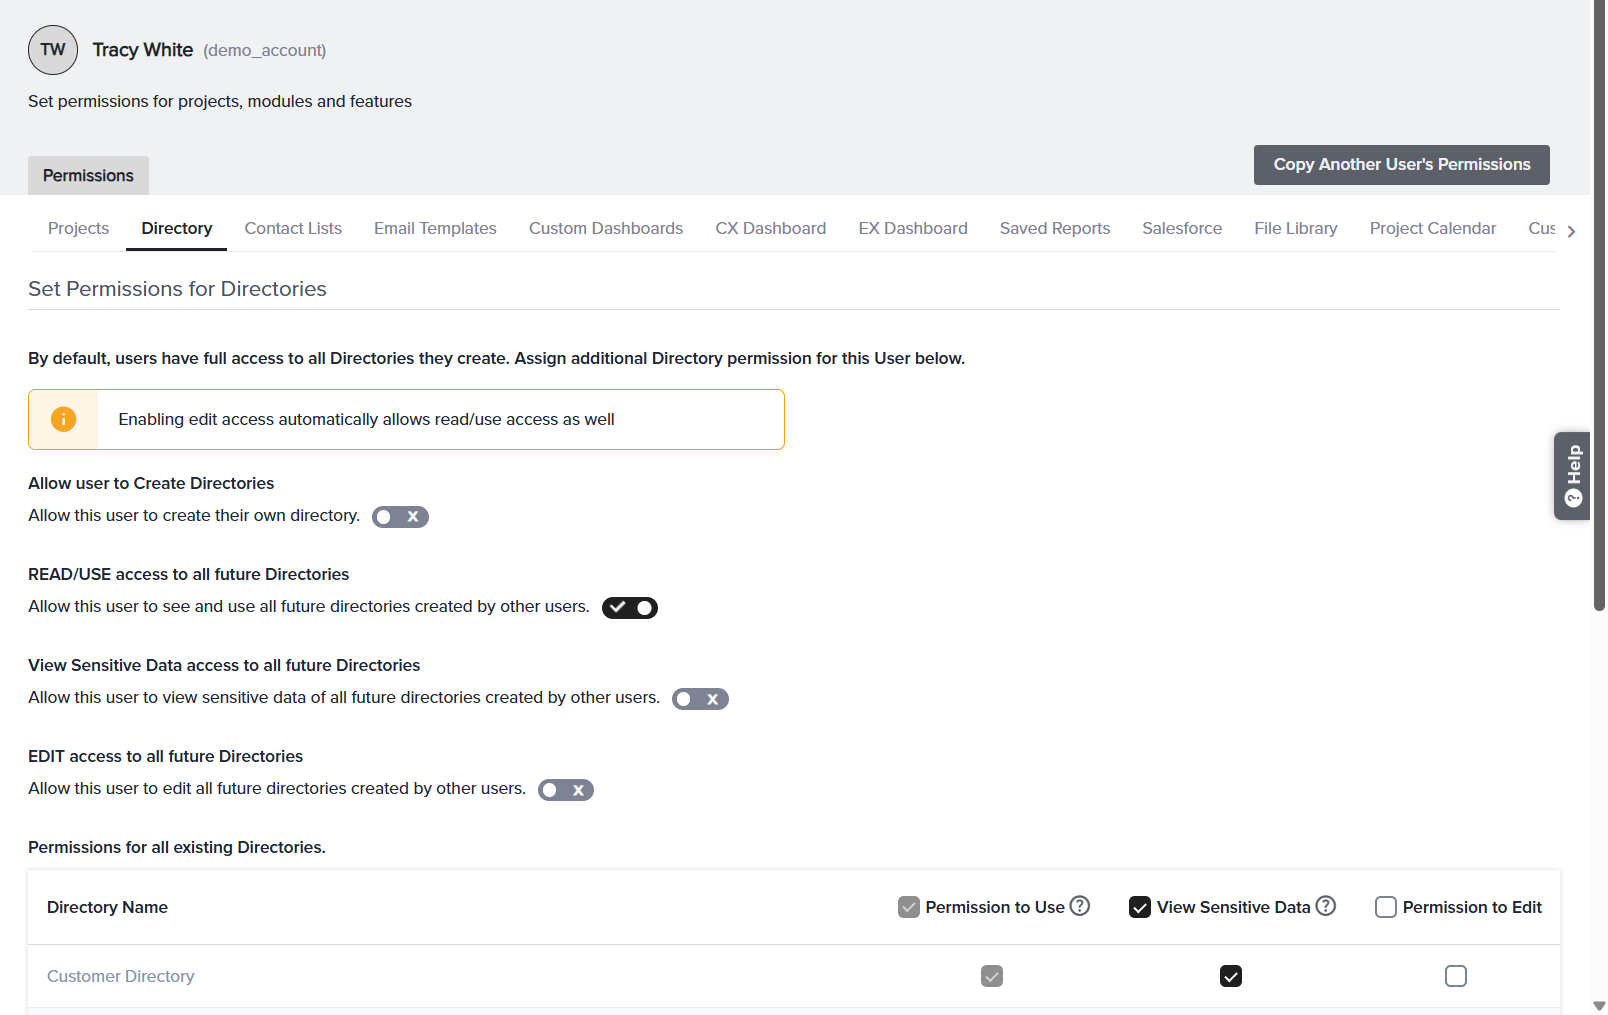
Permissions for Directory
Set Permissions for Directories — determines which directories a user can access and edit and defines the level of contact data they can view within those directories. By default, users have full access to any directories they create. This wizard allows administrators to grant access to directories created by other users.
| Control | What it does | |
| Allow user to Create Directories | When enabled, the user can create and manage their own directories. | |
| READ/USE access to all future Directories | When enabled it auto-grants View and Use access to every directory created by other users | |
| View Sensitive Data in All Future Directories | Controls whether the user can view sensitive data fields in all future directories created by other users. When disabled, these fields remain masked. | |
| EDIT access to all future Directories | Lets the user modify all future directories created by others. | |
| Permissions for All Existing Directories | Use this section to manage a sub-user’s access to existing directories. Each directory appears as a separate row in the table and provides three independent permissions: Permission to Use, View Sensitive Data, and Permission to Edit. Enable the required permissions for each directory based on the level of access you want the sub-user to have. |
View Sensitive Data is a separate permission from Use and Edit — this is what lets you give someone working access to a directory while still hiding personal data.
A campaign coordinator needs to send to the Customer Directory but must not see personal contact details. You tick Permission to Use on that row and leave View Sensitive Data unchecked — they can build distributions against the directory, but email and phone columns stay masked.
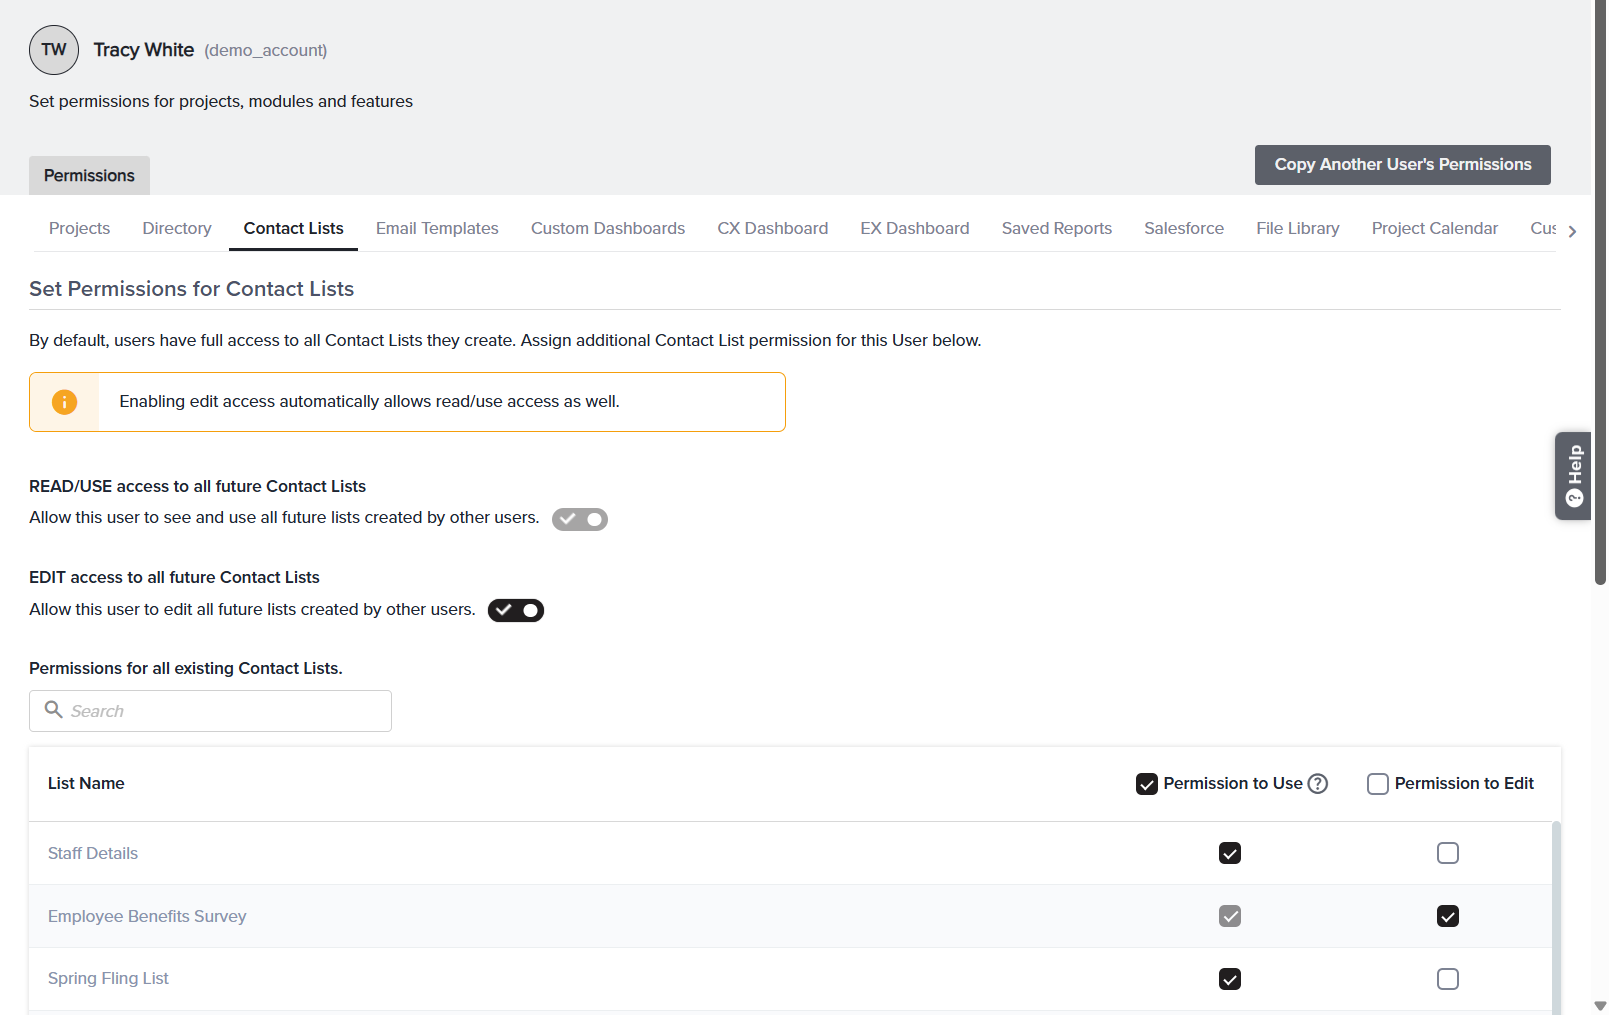
Permissions for Contact Lists
Set Permissions for Contact Lists — controls which contact lists the user can use and edit. By default, users have full access to lists they create; this wizard assigns additional access to lists created by others.
| Control | What it does | |
| READ/USE access to all future Contact Lists | Auto-grants view/use access to every list other users create going forward. | |
| EDIT access to all future Contact Lists | Lets the user edit all future lists created by others (read/use included automatically). | |
| Permissions for all existing Contact Lists | A searchable table of current lists, each with Permission to Use and Permission to Edit checkboxes. Header checkboxes apply a column to every visible list. |
A contact-list manager needs to maintain shared lists. You turn on EDIT access to all future Contact Lists — which also grants Read/Use — so they can clean and update any list the team creates, now or later.
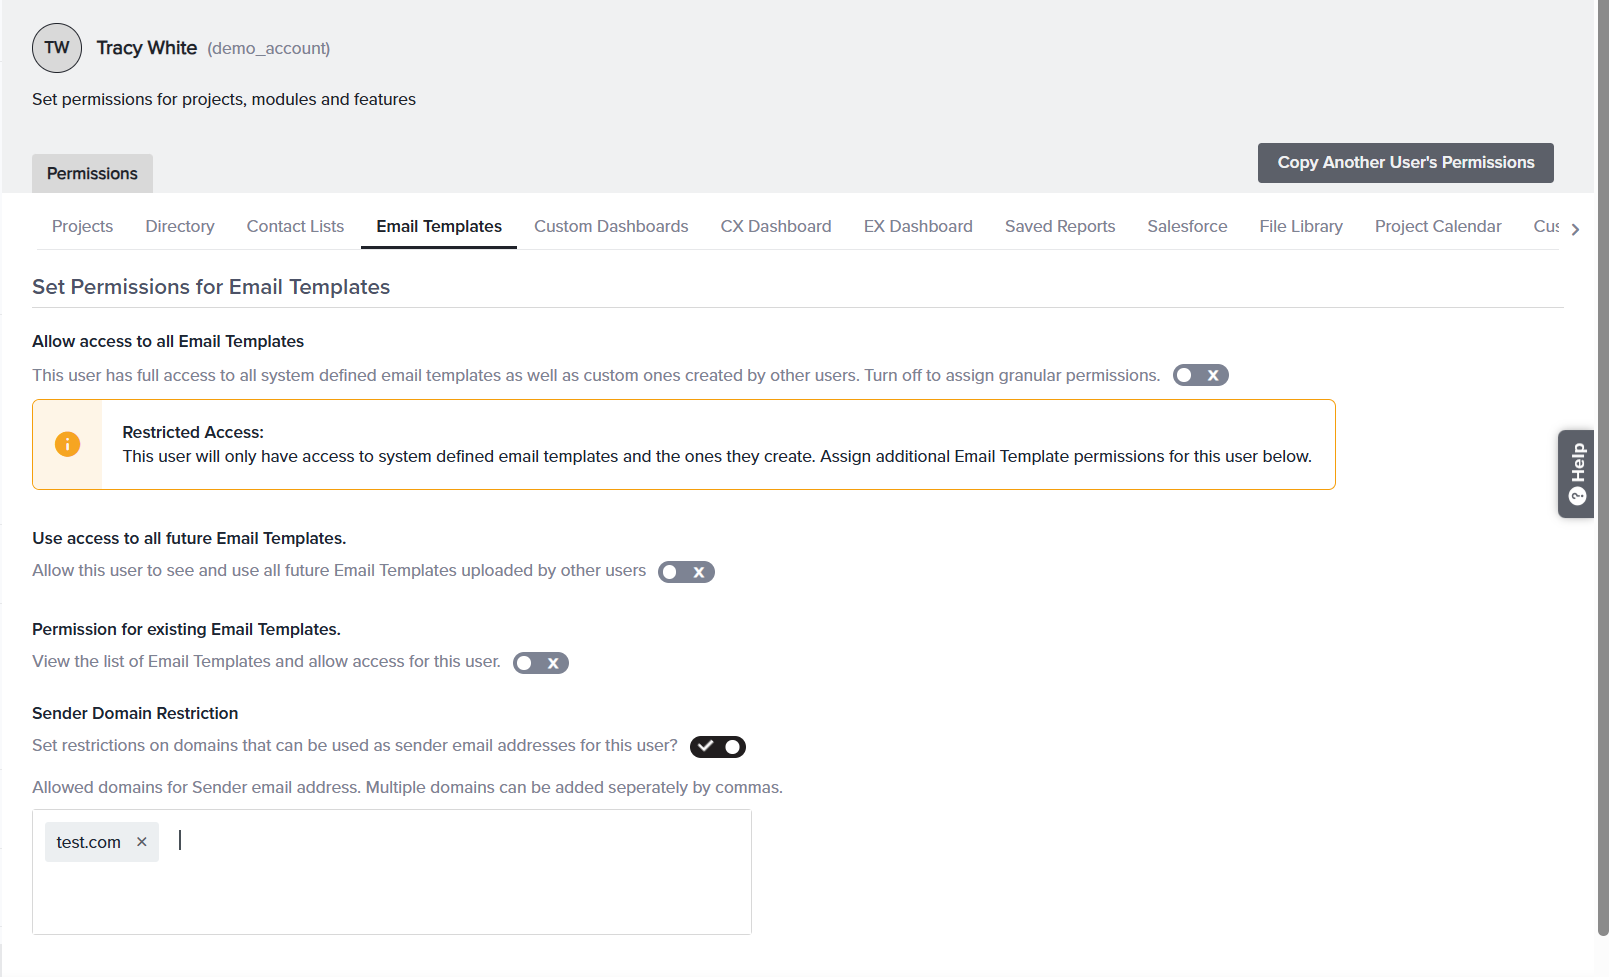
Permissions for Email Templates
Set Permissions for Email Templates — controls access to email templates and which sender domains the user may use.
| Control | What it does | |
| Allow access to all Email Templates | When on, the user has full access to all system-defined email templates as well as custom ones created by other users. Turn it off to assign granular permissions. | |
| Use access to all future Email Templates. | When on, allows the sub-user to see and use all future Email Templates uploaded by other users. | |
| Permission for existing Email Templates. | When enabled, existing email templates become available for permission assignment. Select the Permission to Use checkbox for any template that the sub-user should be allowed to access and use. | |
| Sender Domain Restriction | When on, sets restrictions on the domains that can be used as sender email addresses for this user. Use it to ensure a user can only send from approved, authenticated domains. |
You want new hires to send only from your verified @company.com domain. You enable Sender Domain Restriction and limit them to that domain, so they can’t accidentally send from an unverified address.
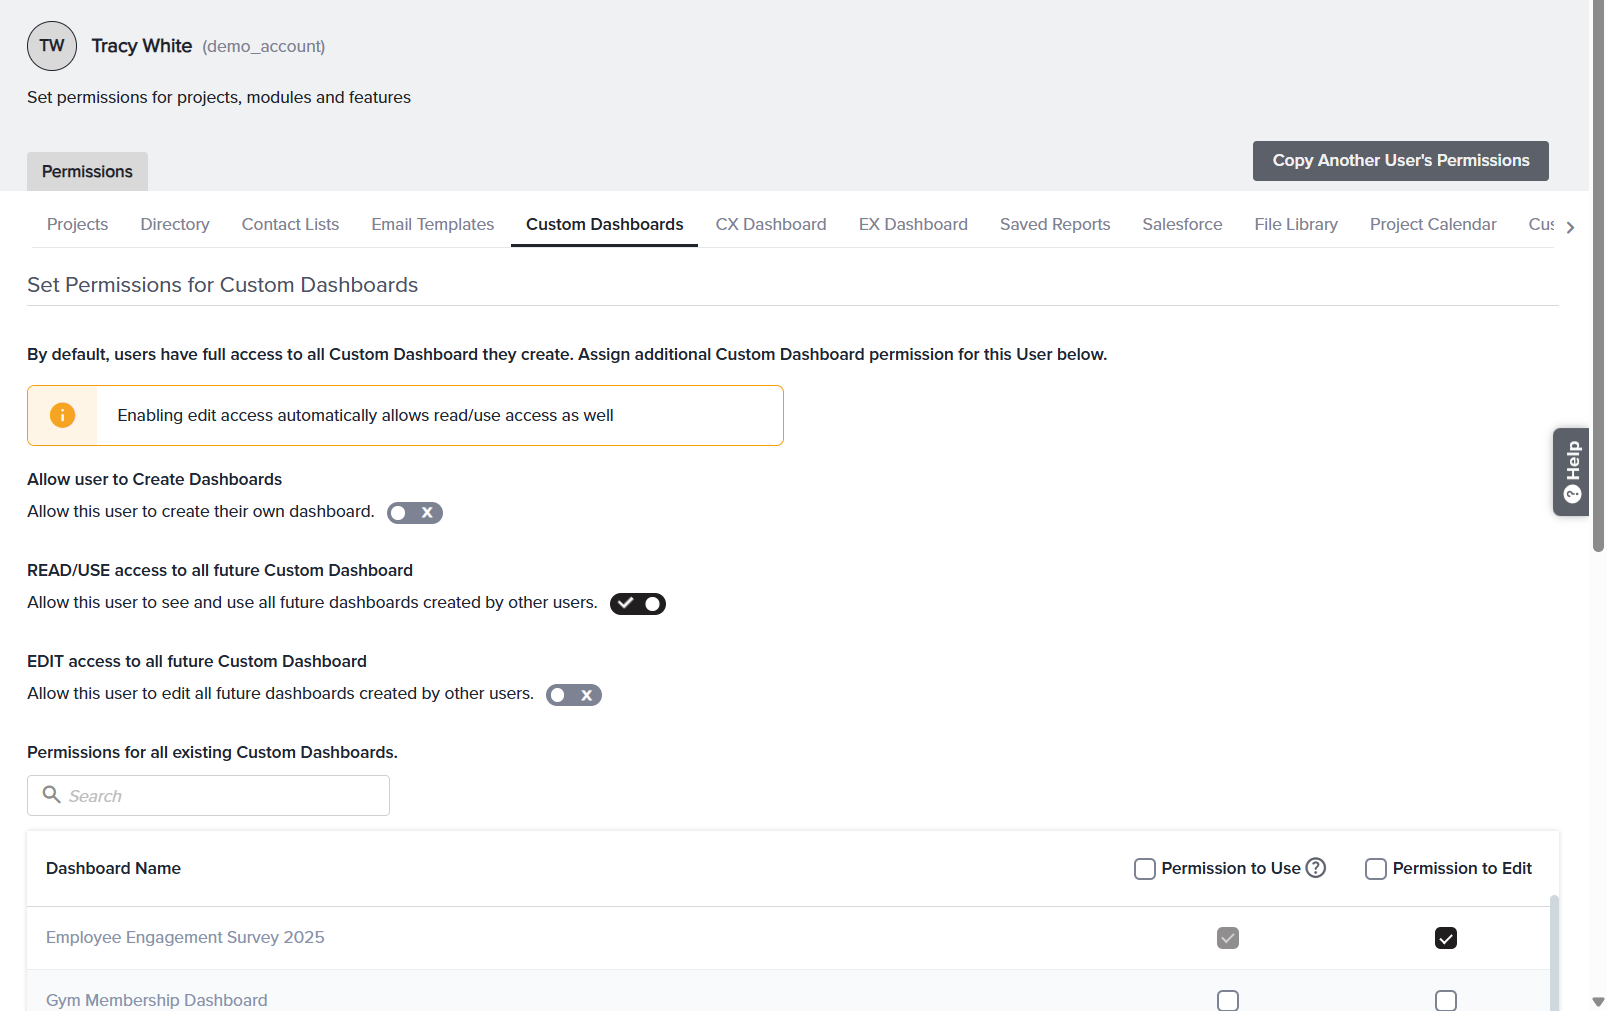
Permissions for Custom Dashboards
Set Permissions for Custom Dashboards — controls who can build dashboards and which existing ones the user can open or edit. By default, users have full access to all custom dashboards they create.
| Control | What it does | |
| Allow user to Create Dashboards | When on, the user can build their own custom dashboards. Turn off for view-only consumers. | |
| READ/USE access to all future Custom Dashboard | Auto-grants view/use access to every dashboard other users create later. | |
| EDIT access to all future Custom Dashboard | Lets the user edit all future dashboards created by others (read/use included). | |
| Permissions for all existing Custom Dashboards | A searchable table of current dashboards with Permission to Use and Permission to Edit checkboxes per row, plus header checkboxes to set a column for all. |
Remember this tab governs Custom Dashboards only. CX Dashboard and EX Dashboard are separate tabs with their own tab-level rules — see Managing CX/EX Dashboard Access.
An executive should read the team’s dashboards but never change them. You turn Allow user to Create Dashboards off, turn READ/USE access to all future Custom Dashboard on, and leave Edit off — they always see the latest dashboards, view-only.
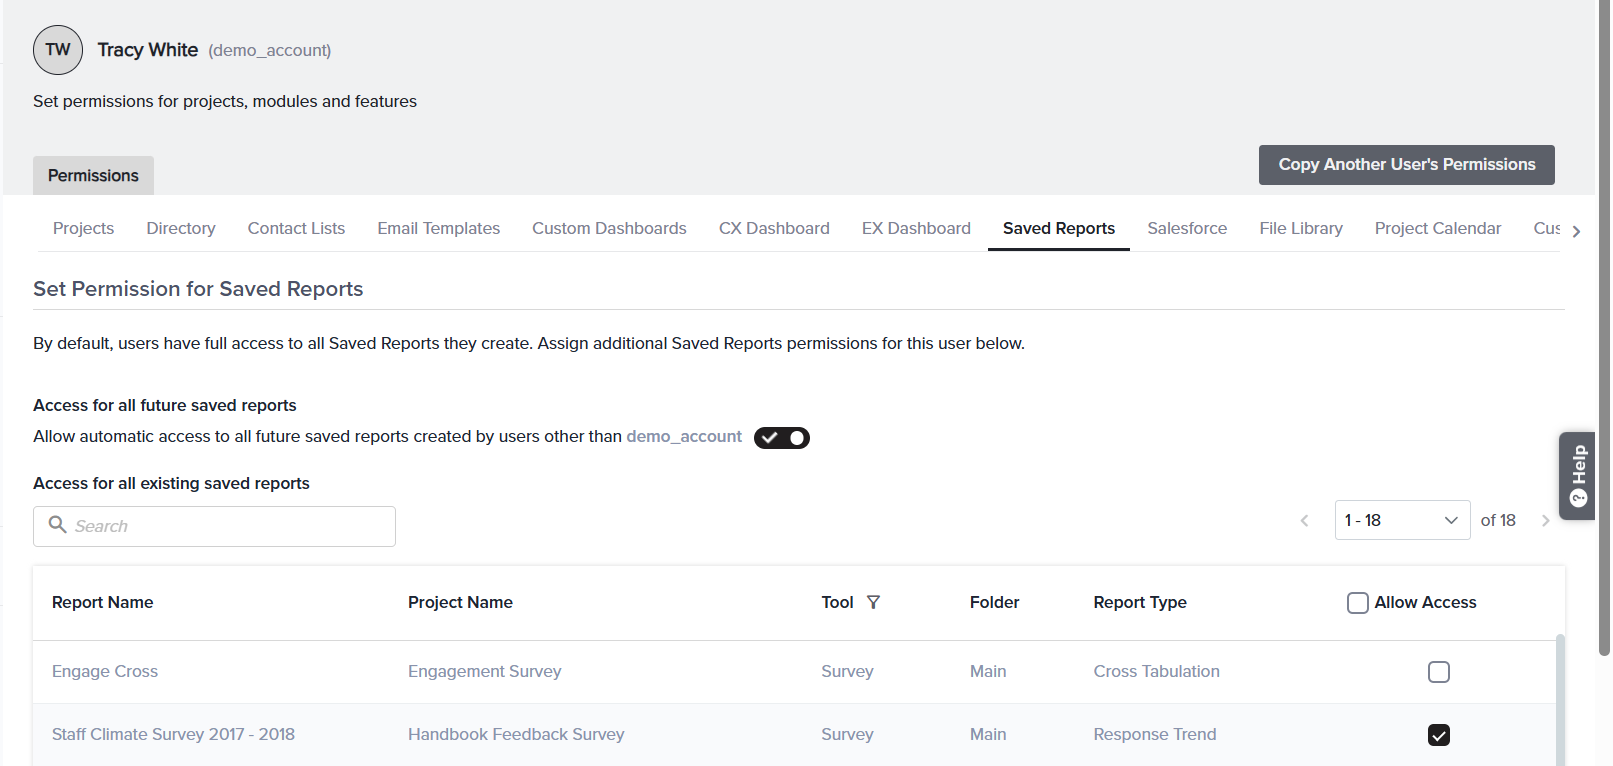
Permissions for Saved Reports
Set Permission for Saved Reports — controls which saved reports the user can open. By default, users have full access to all saved reports they create.
| Control | What it does | |
| Access for all future saved reports | Allow automatic access to all future saved reports created by other users. When on, every report anyone else saves from now on is automatically available — no need to return to this wizard. | |
| Access for all existing saved reports | A searchable, paginated table of reports that already exist. Each row shows Report Name, Project Name, Tool, Folder, and Report Type, with a single Allow Access checkbox to grant that report. Use the header Allow Access checkbox to grant every report on the page at once. |
Unlike Contact Lists or Directories, Saved Reports has a single Allow Access checkbox per report (there’s no separate edit level) — access here means the user can open and view the saved report.
A stakeholder needs to follow two specific reports but nothing else. You leave Access for all future saved reports off, search the existing list for each report by name, and tick Allow Access only on those two rows.
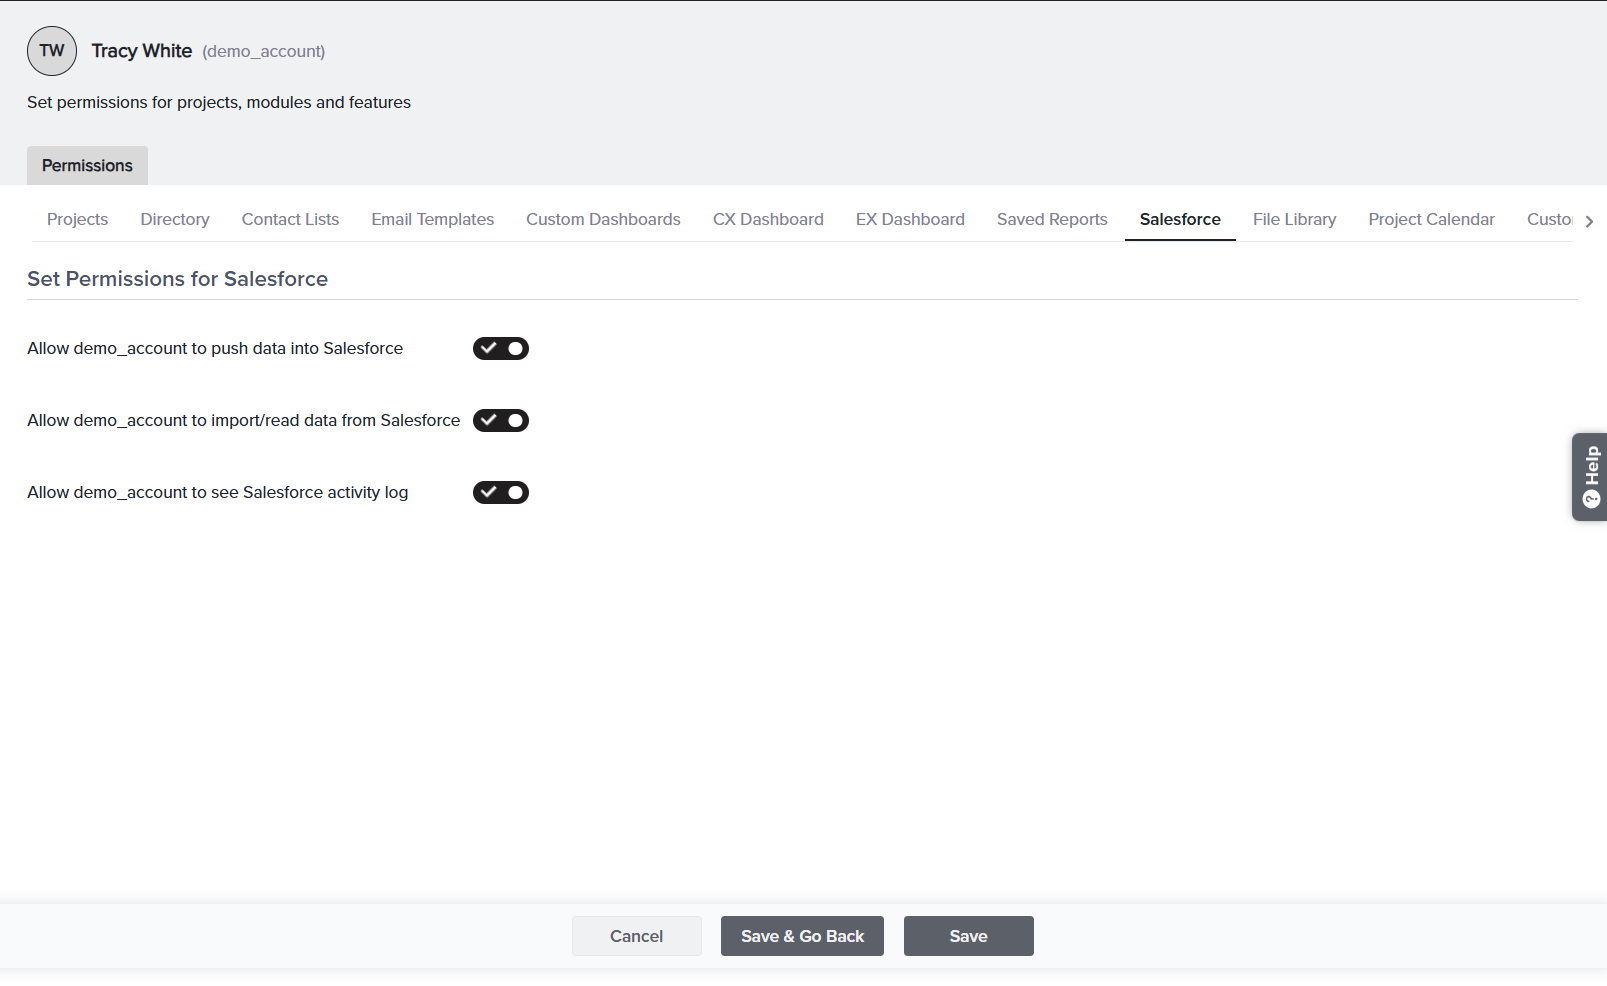
Permissions for Salesforce
Set Permissions for Salesforce — controls how the user can interact with your connected Salesforce integration. Each capability is an independent toggle, named after the user.
| Control | What it does | |
| Allow [user] to push data into Salesforce | Lets the user send Sogolytics data out to Salesforce. | |
| Allow [user] to import/read data from Salesforce | Lets the user pull Salesforce records into Sogolytics (for example, to build a directory or distribute a survey). | |
| Allow [user] to see Salesforce activity log | Lets the user view the log of Salesforce sync activity. |
Because each direction is separate, you can grant read-only integration access without allowing the user to push anything back.
An analyst should be able to bring Salesforce contacts into Sogolytics but must never write data back. You turn on import/read data from Salesforce and leave push data into Salesforce off.
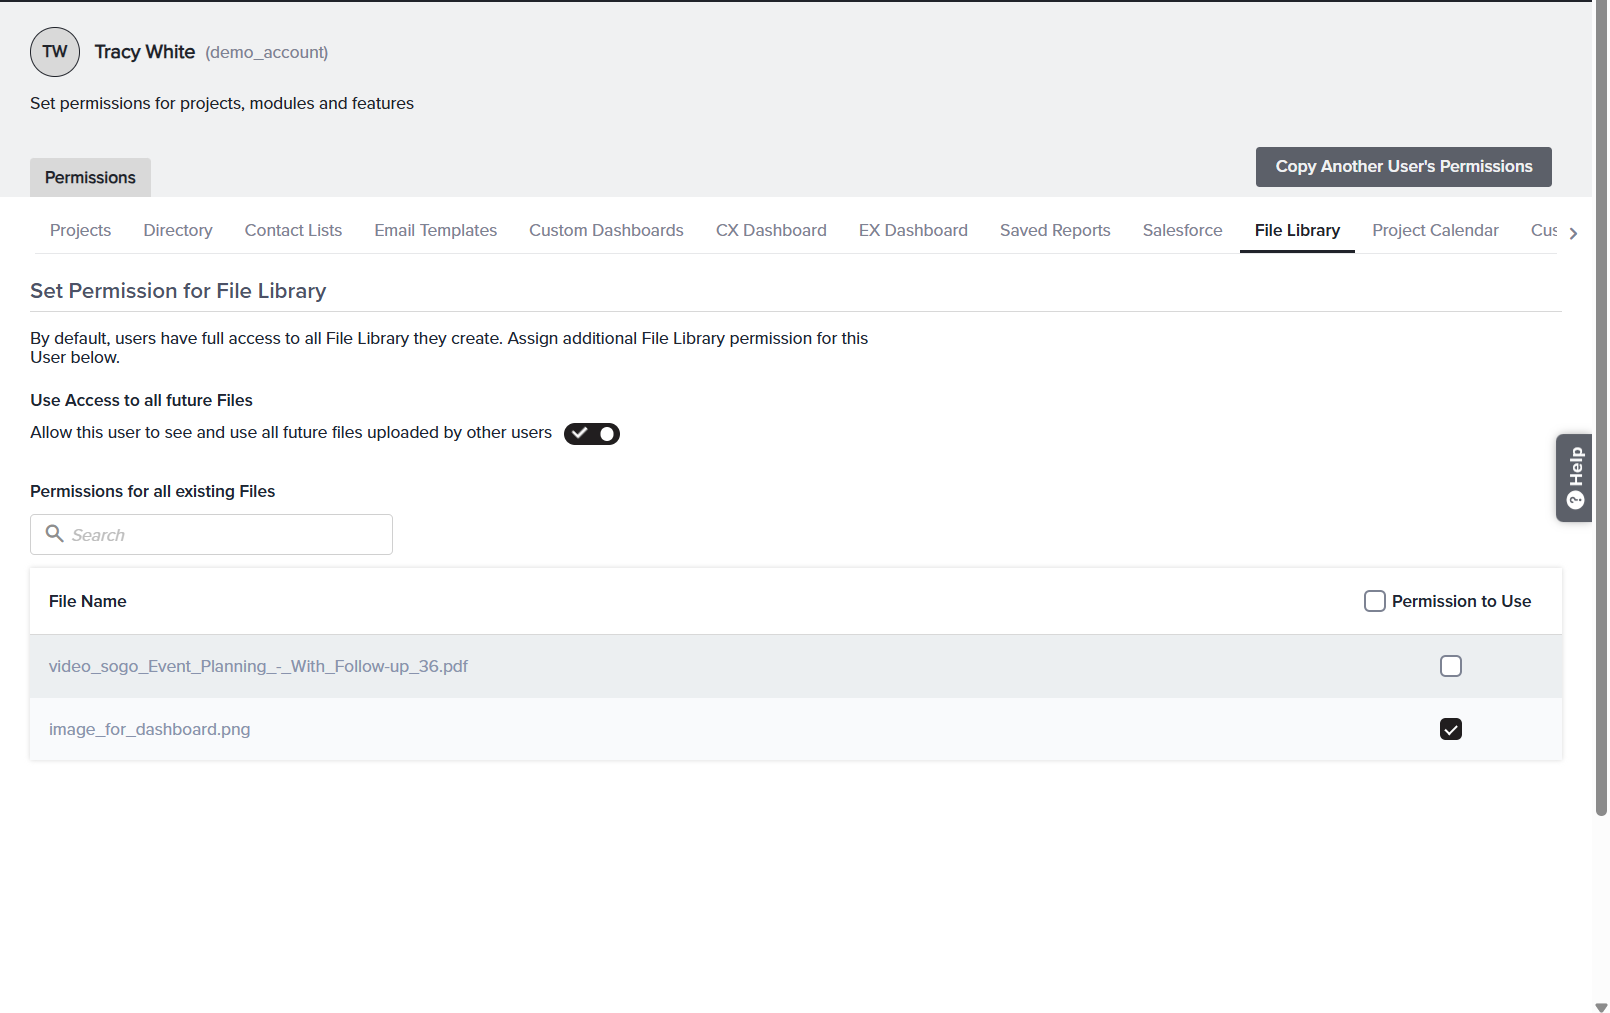
Permissions for File Library
Set Permission for File Library — controls which shared files the user can see and use. By default, users have full access to all files they upload.
| Control | What it does | |
| Use Access to all future Files | Allow this user to see and use all future files uploaded by other users. When on, every file uploaded later is automatically available. | |
| Permissions for all existing Files | A searchable table of files already in the library, each with a single Permission to Use checkbox. The header checkbox grants every listed file at once. |
The File Library uses a single Permission to Use level — there’s no separate edit permission, because library files are shared assets to be used rather than altered.
A designer needs the shared logo and banner files for survey themes. You search the existing files and tick Permission to Use on those assets, leaving the rest unticked.
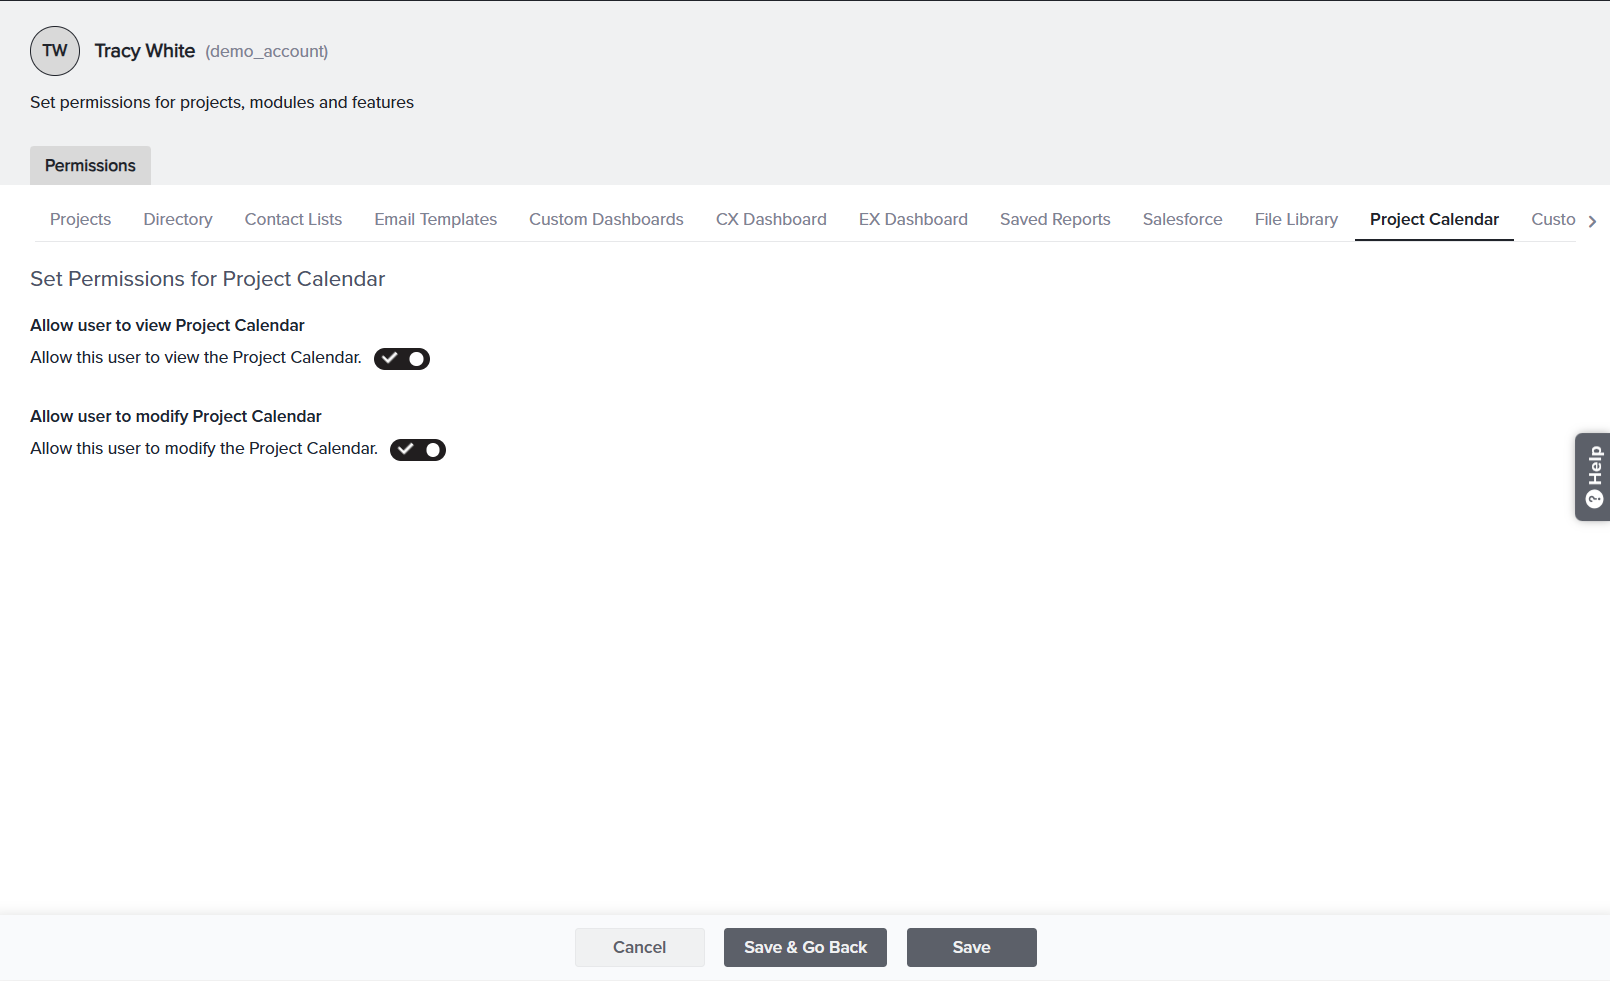
Permissions for Project Calendar
Set Permissions for Project Calendar — controls whether the user can see and change the shared project calendar. Two simple toggles:
| Control | What it does | |
| Allow user to view Project Calendar | Turn on so the user can see scheduled project activity. | |
| Allow user to modify Project Calendar | Turn on to let the user add or change calendar entries. Pair it with view access. |
A coordinator should keep the calendar current, so you turn on both view and modify. A read-only stakeholder gets view on, modify off — they can see the schedule but can’t change it.
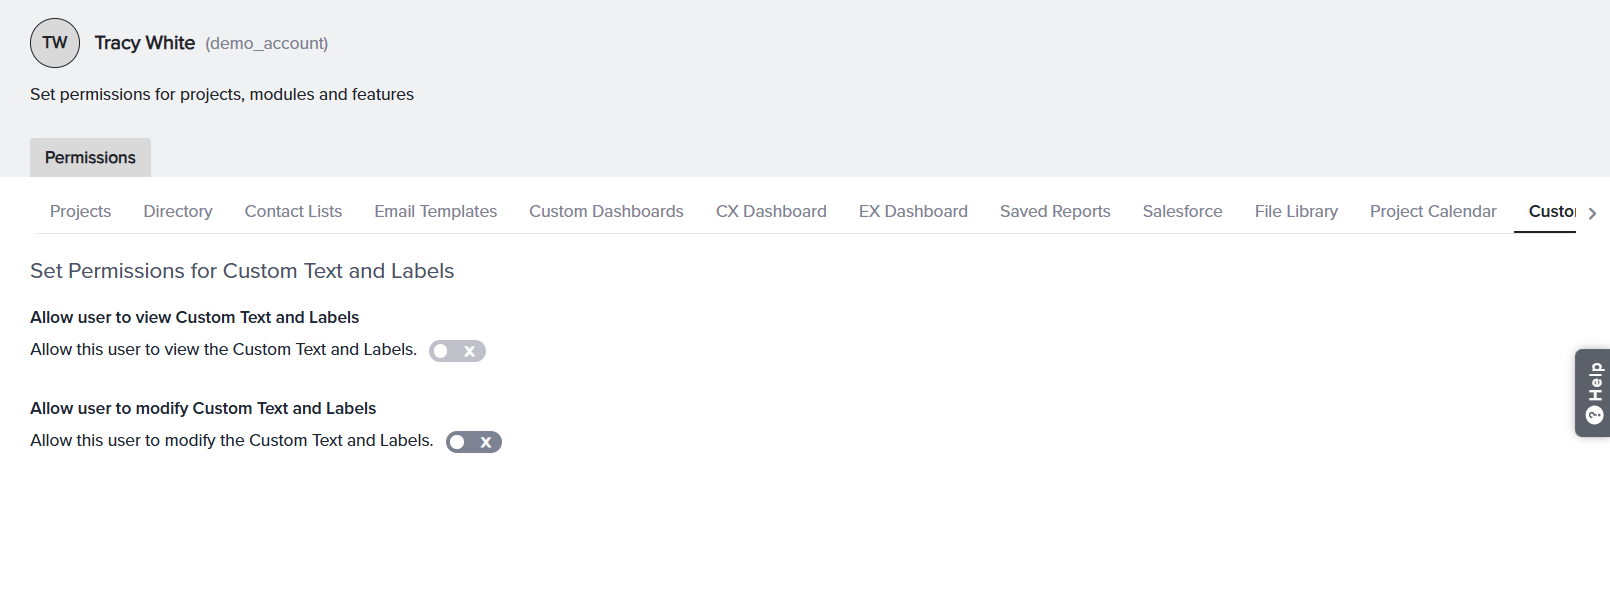
Permissions for Custom Text and Labels
Set Permissions for Custom Text and Labels — controls whether the user can see and change your account’s custom wording and labels. Two toggles:
| Control | What it does | |
| Allow user to view Custom Text and Labels | Allow this user to view the Custom Text and Labels. | |
| Allow user to modify Custom Text and Labels | Allow this user to modify the Custom Text and Labels. |
Important: Custom Text and Labels are account-wide. Any change a user makes here affects your entire organizational account, not just their own projects — so grant modify access sparingly, and reserve it for trusted administrators.
You want a brand manager to refine product terminology everywhere, so you grant both view and modify. For everyone else you leave modify off to protect the account-wide wording.
Tip: If more tabs exist than fit on wizard, use the ‹ › arrows at the right end of the tab strip to scroll to File Library, Project Calendar, and Custom Text and Labels.
Copy another user’s permissions
Rather than rebuilding a setup from scratch, you can copy one already in place.
On the permissions wizard, use Copy Another User’s Permissions (also available as Duplicate Permission at the top of the Projects view). Choose the user to copy from and which permissions to bring over.
You’ve fully configured analyst_01. When analyst_02 joins the same team, open their permissions, choose Copy Another User’s Permissions, pick analyst_01, and their access is mirrored in seconds — then tweak any differences.
Saving and reviewing
- Most areas offer Save and Save & Go Back.
- To audit everything you’ve assigned, return to User Management and use the export option to download all sub-user permissions to Excel.
You can audit the sub-users created and review the permissions assigned to them by using the Export option next to More on User Management Dashboard. This allows you to download all sub-user-related data into an Excel file for further analysis.
Subscribe for tips and insights to drive better decisions!

