


Data Visibility Permissions
Data Visibility Rules provide a second layer of access control for sub-users. While Permissions determine which directories, dashboards, and features a user can access, Data Visibility Rules determine which records, responses, contacts, activities, or dashboard data they can view within those areas.
Data Visibility feature is only available to the Report Viewer sub-user Type.
Navigate to
- Accessing Data Visibility Settings
- Understanding the Data Visibility Screen
- Creating a Data Visibility Rule for Directories
- Data Visibility Rules for Custom Dashboards
- Data Visibility Rules for CX Dashboard
- Data Visibility Rules for EX Dashboard
- Managing Existing Rules
- Rule Priority
- Best Practices
- Related Articles
Accessing Data Visibility Settings
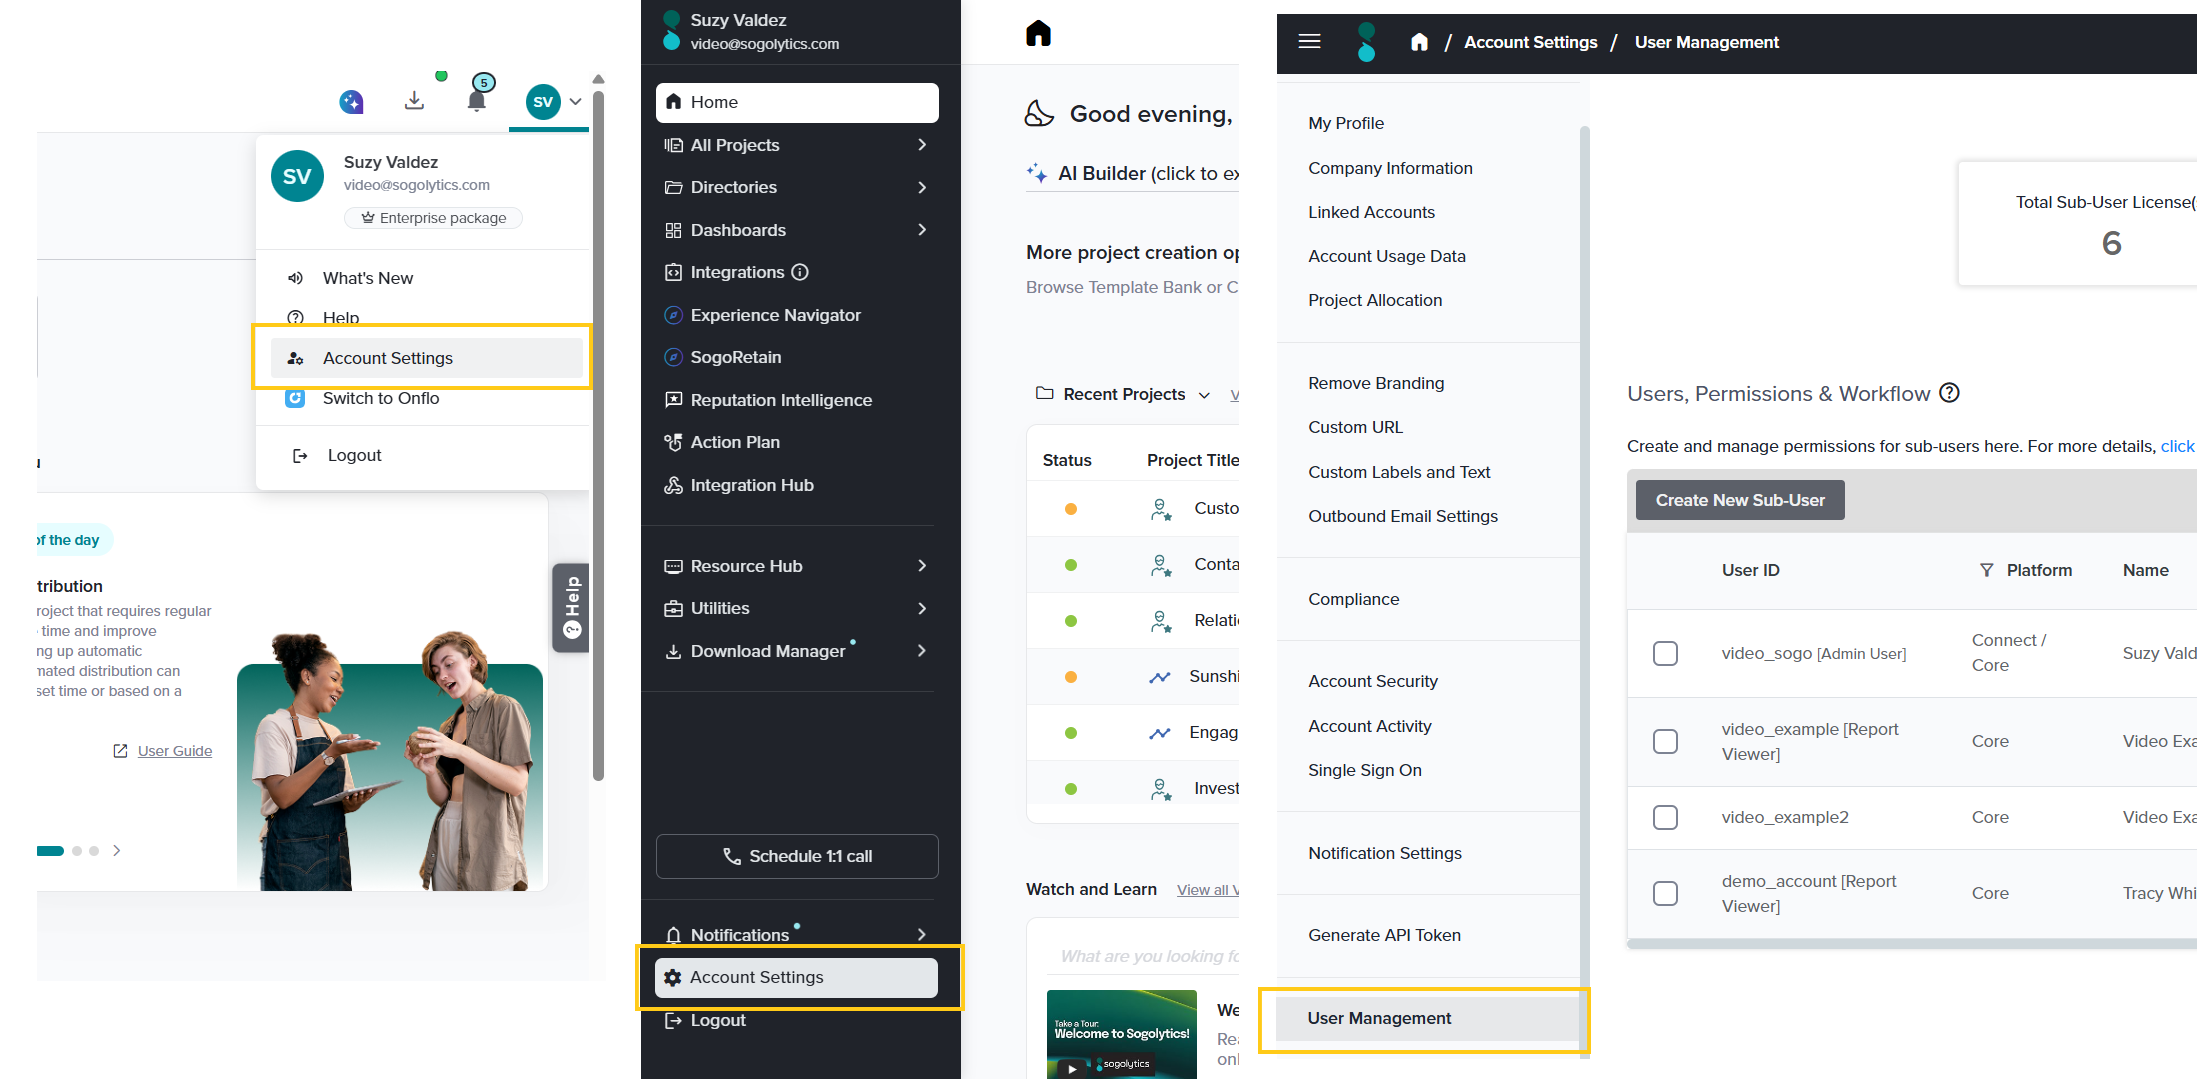
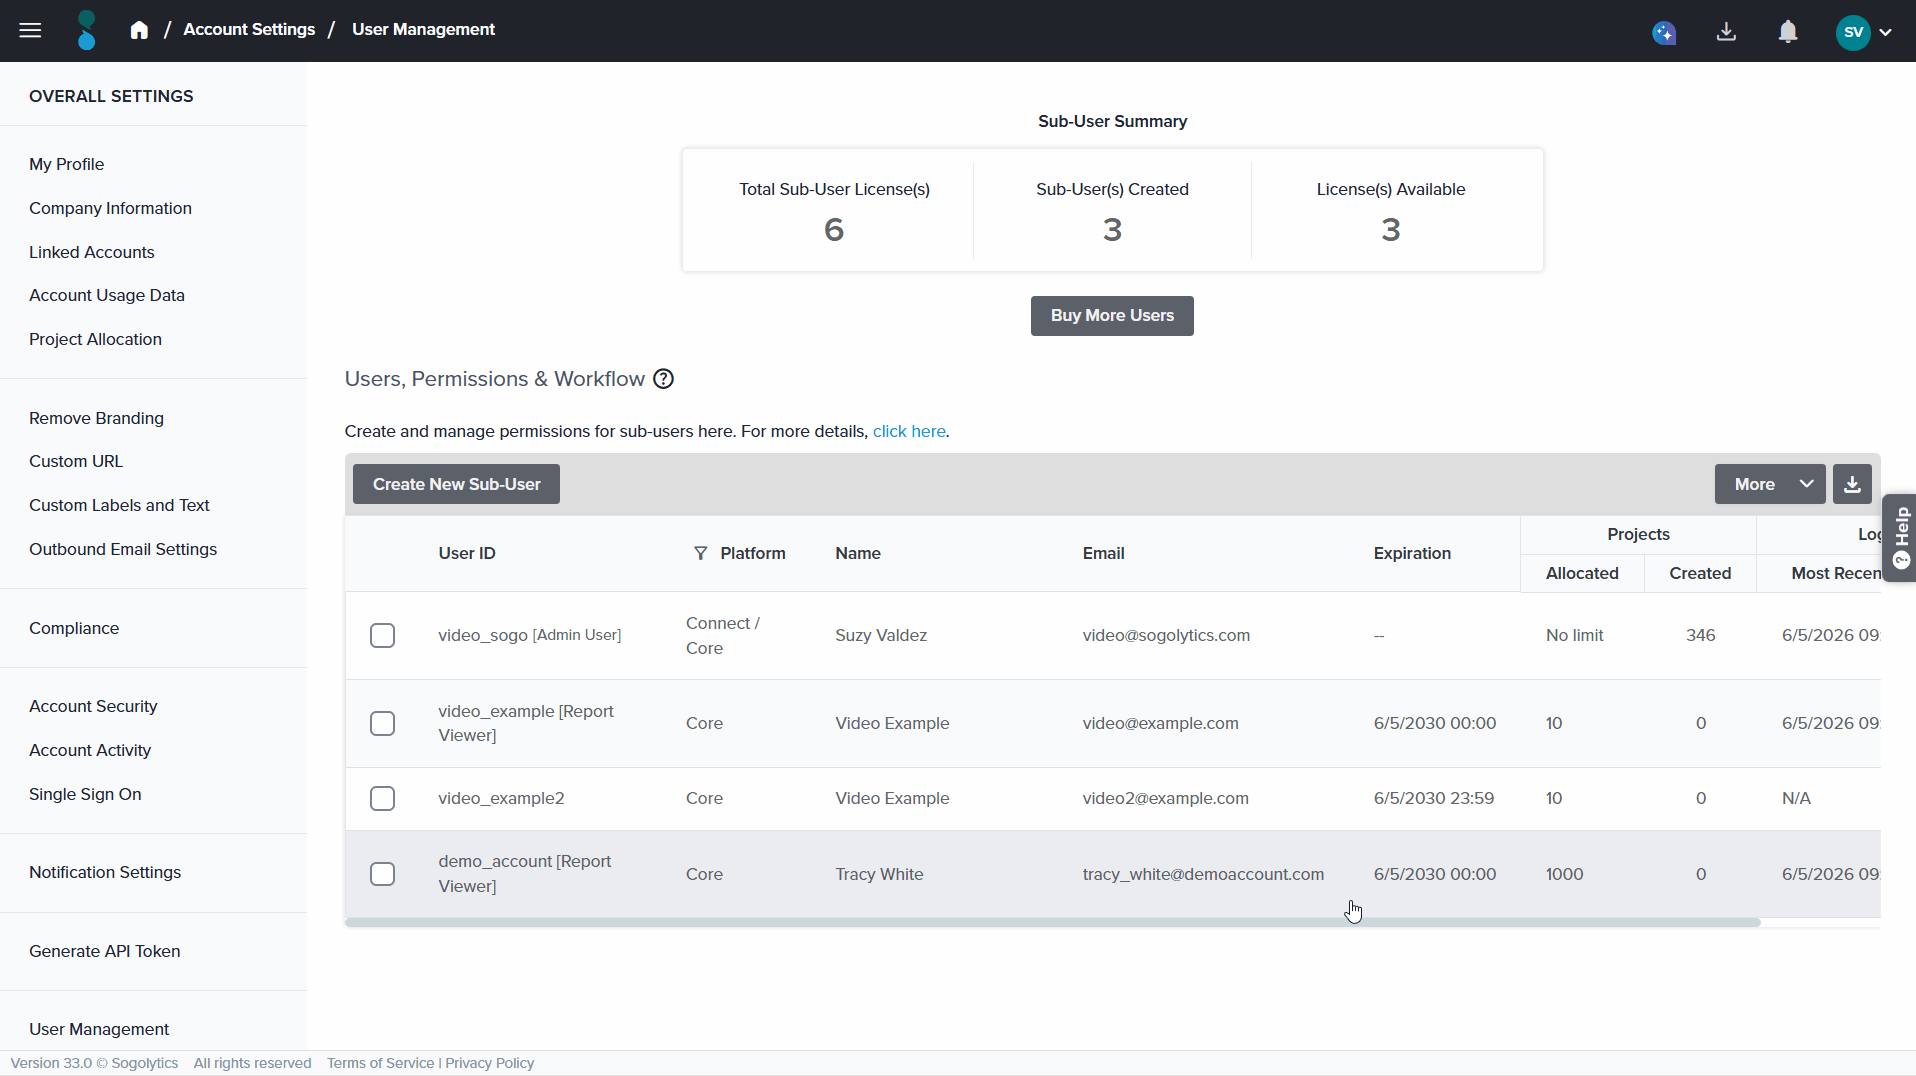
- To access User Management, click your Account Initials in the top-right corner and select Account Settings → User Management. Alternatively, click Account Settings at the bottom of the left-hand menu on the Home Page, then select User Management.
- On the User Management page, select the Report Viewer sub-user you want to configure.
- Click Set Permission. This opens the Set Permissions wizard.
- The wizard is organized into two tabs at the top, which together form the two layers of access control for a sub-user:
- Permissions — controls which projects, modules, and features the user can access.
- Data Visibility — controls which records appear inside the items they’re allowed to access.
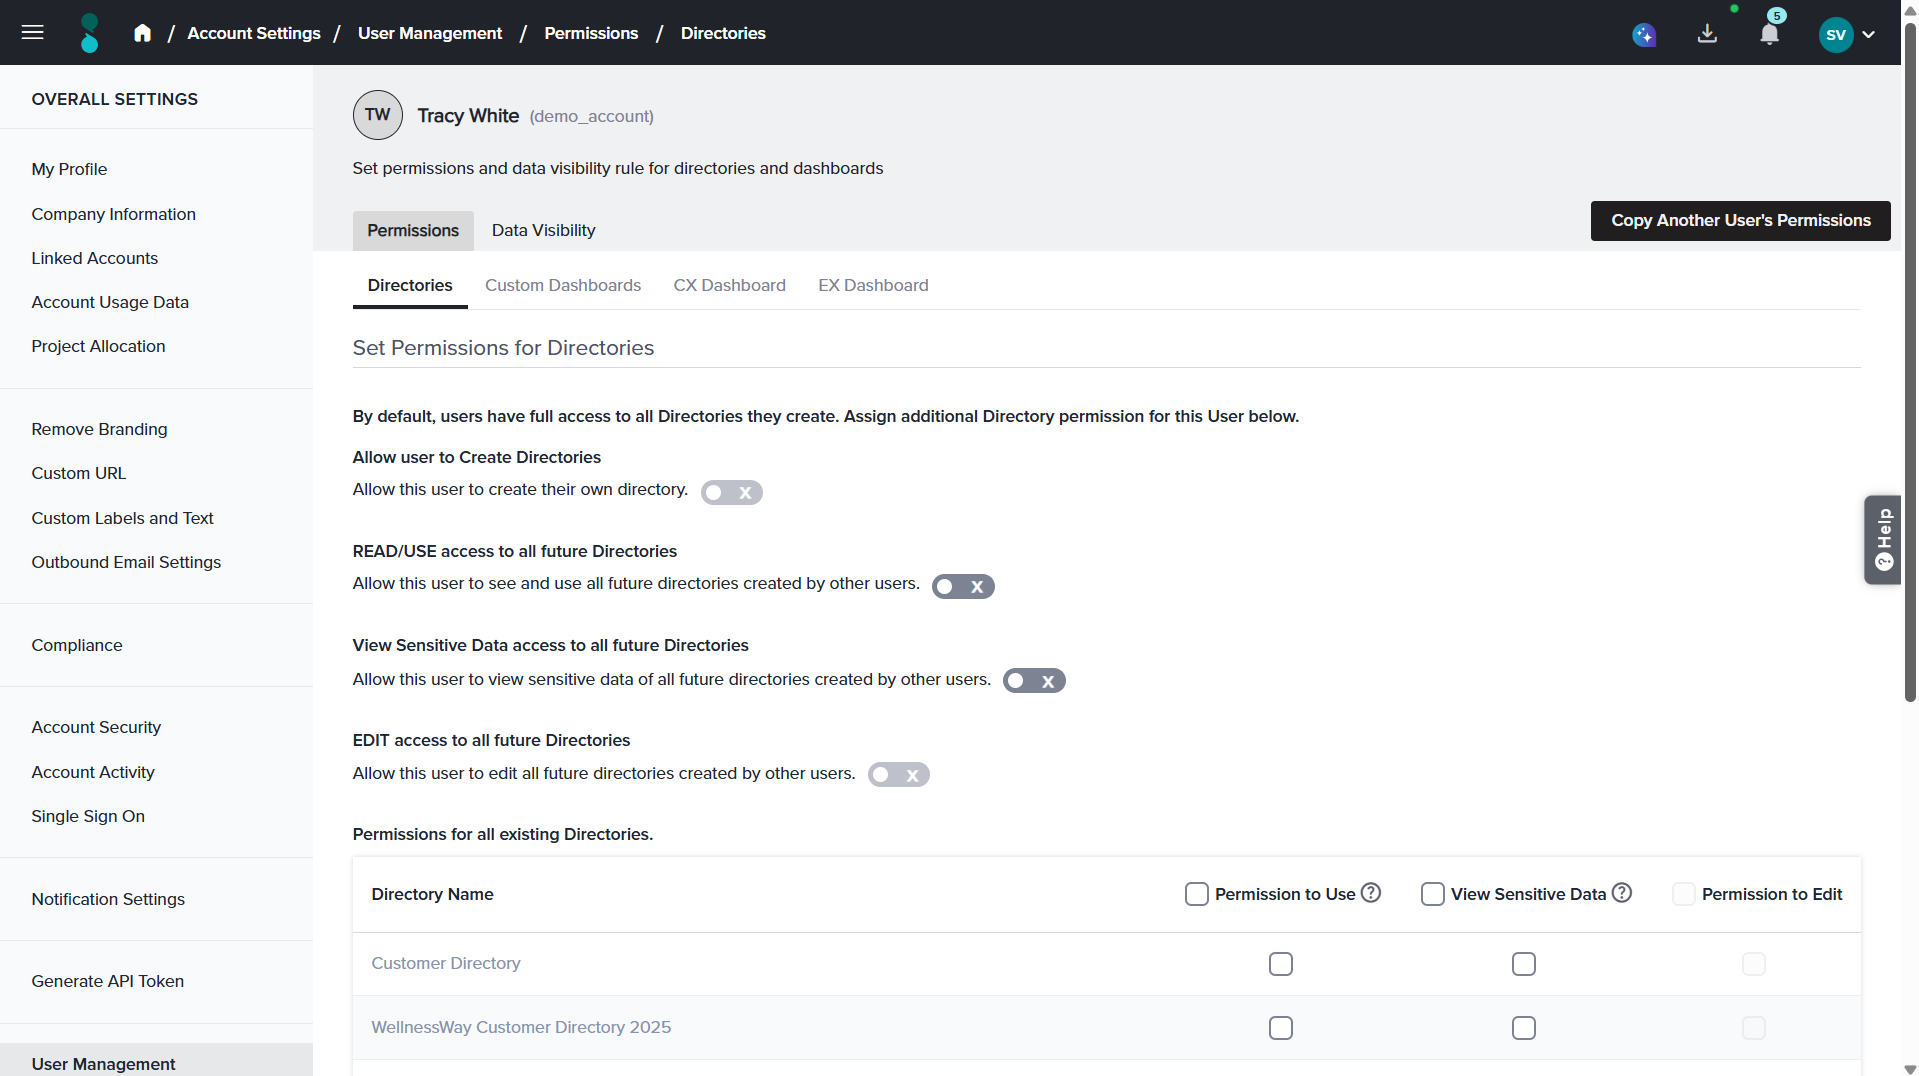
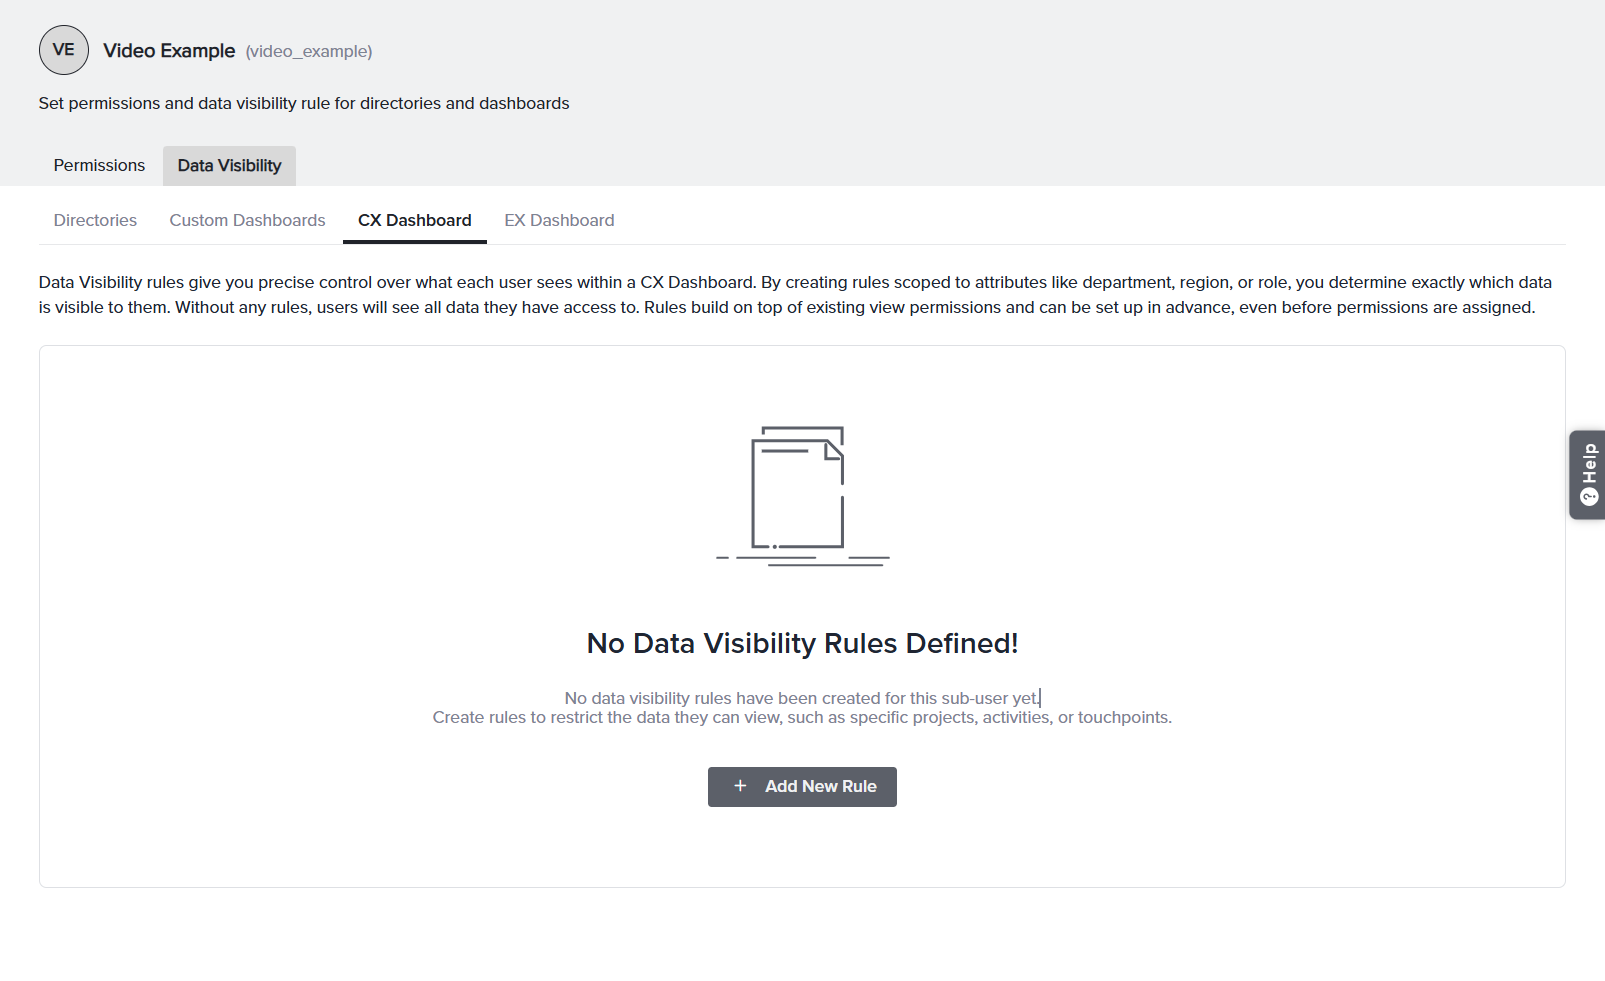
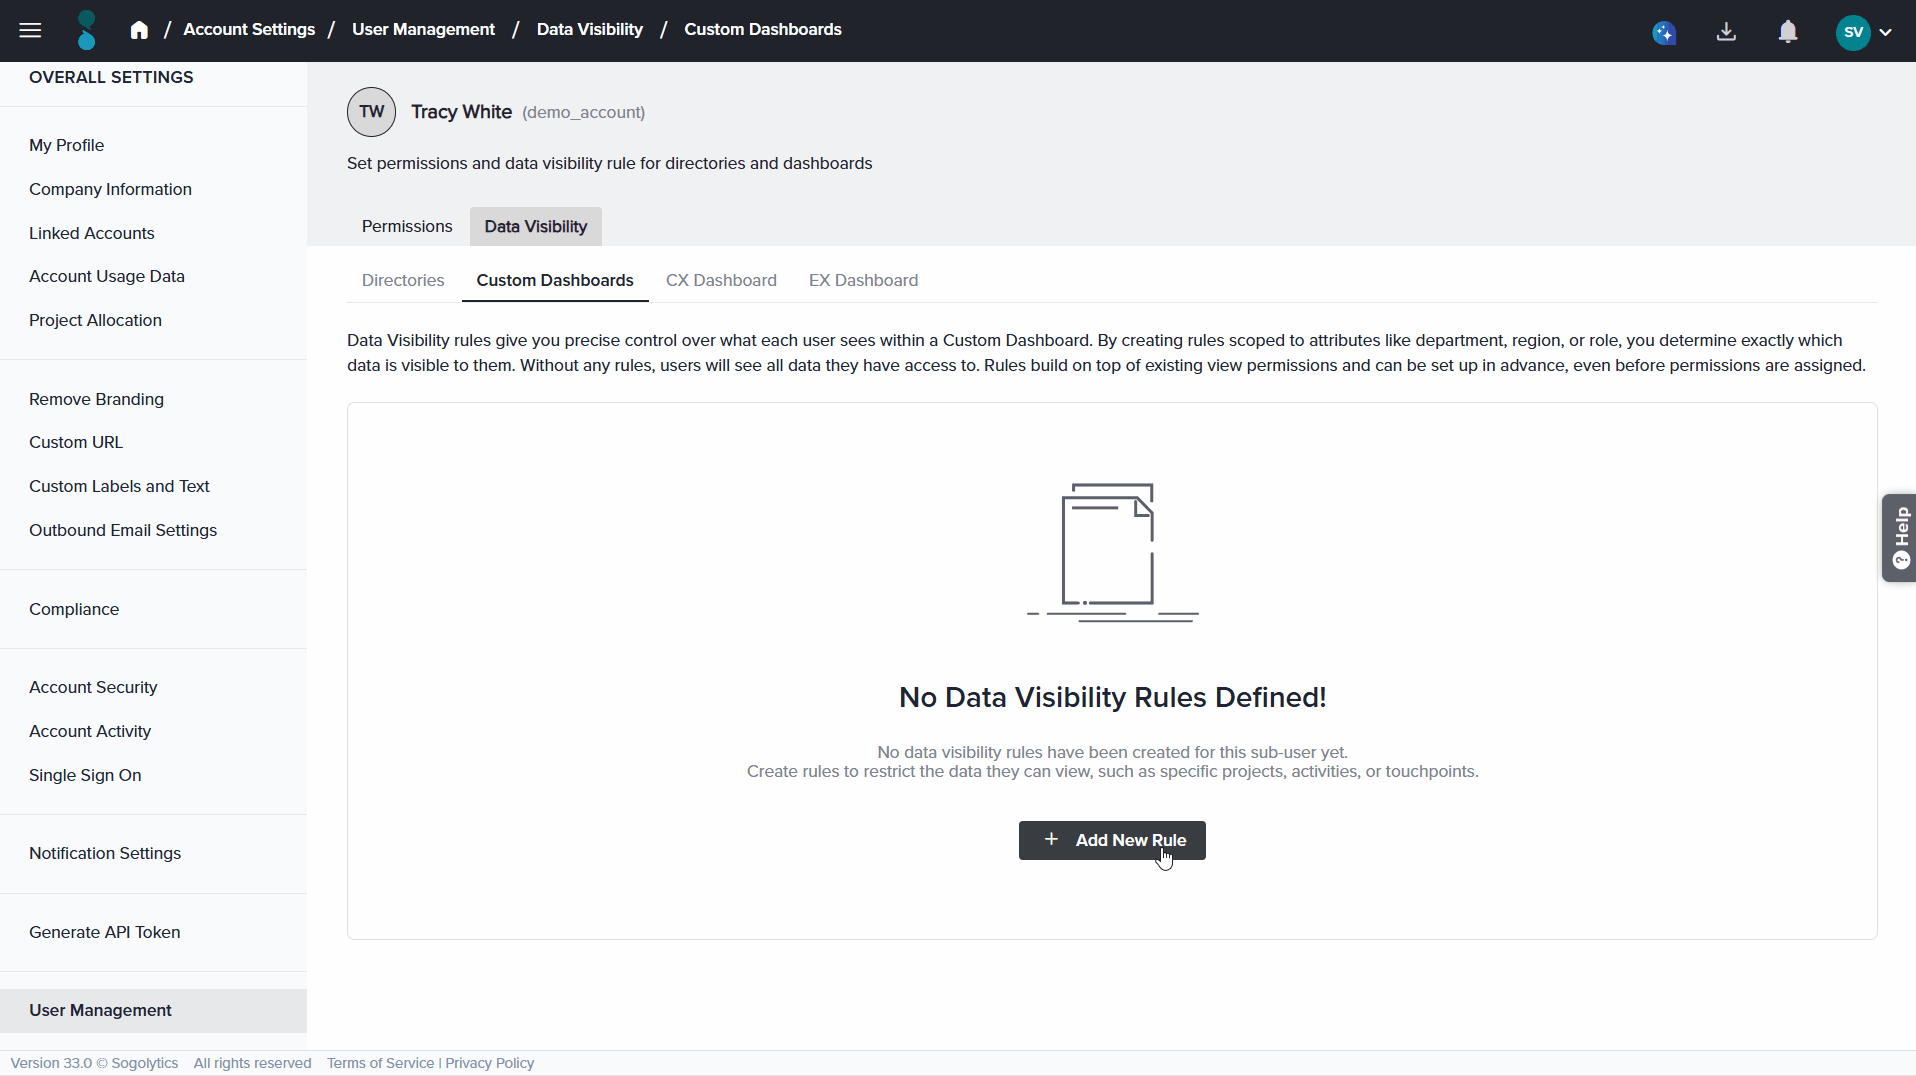
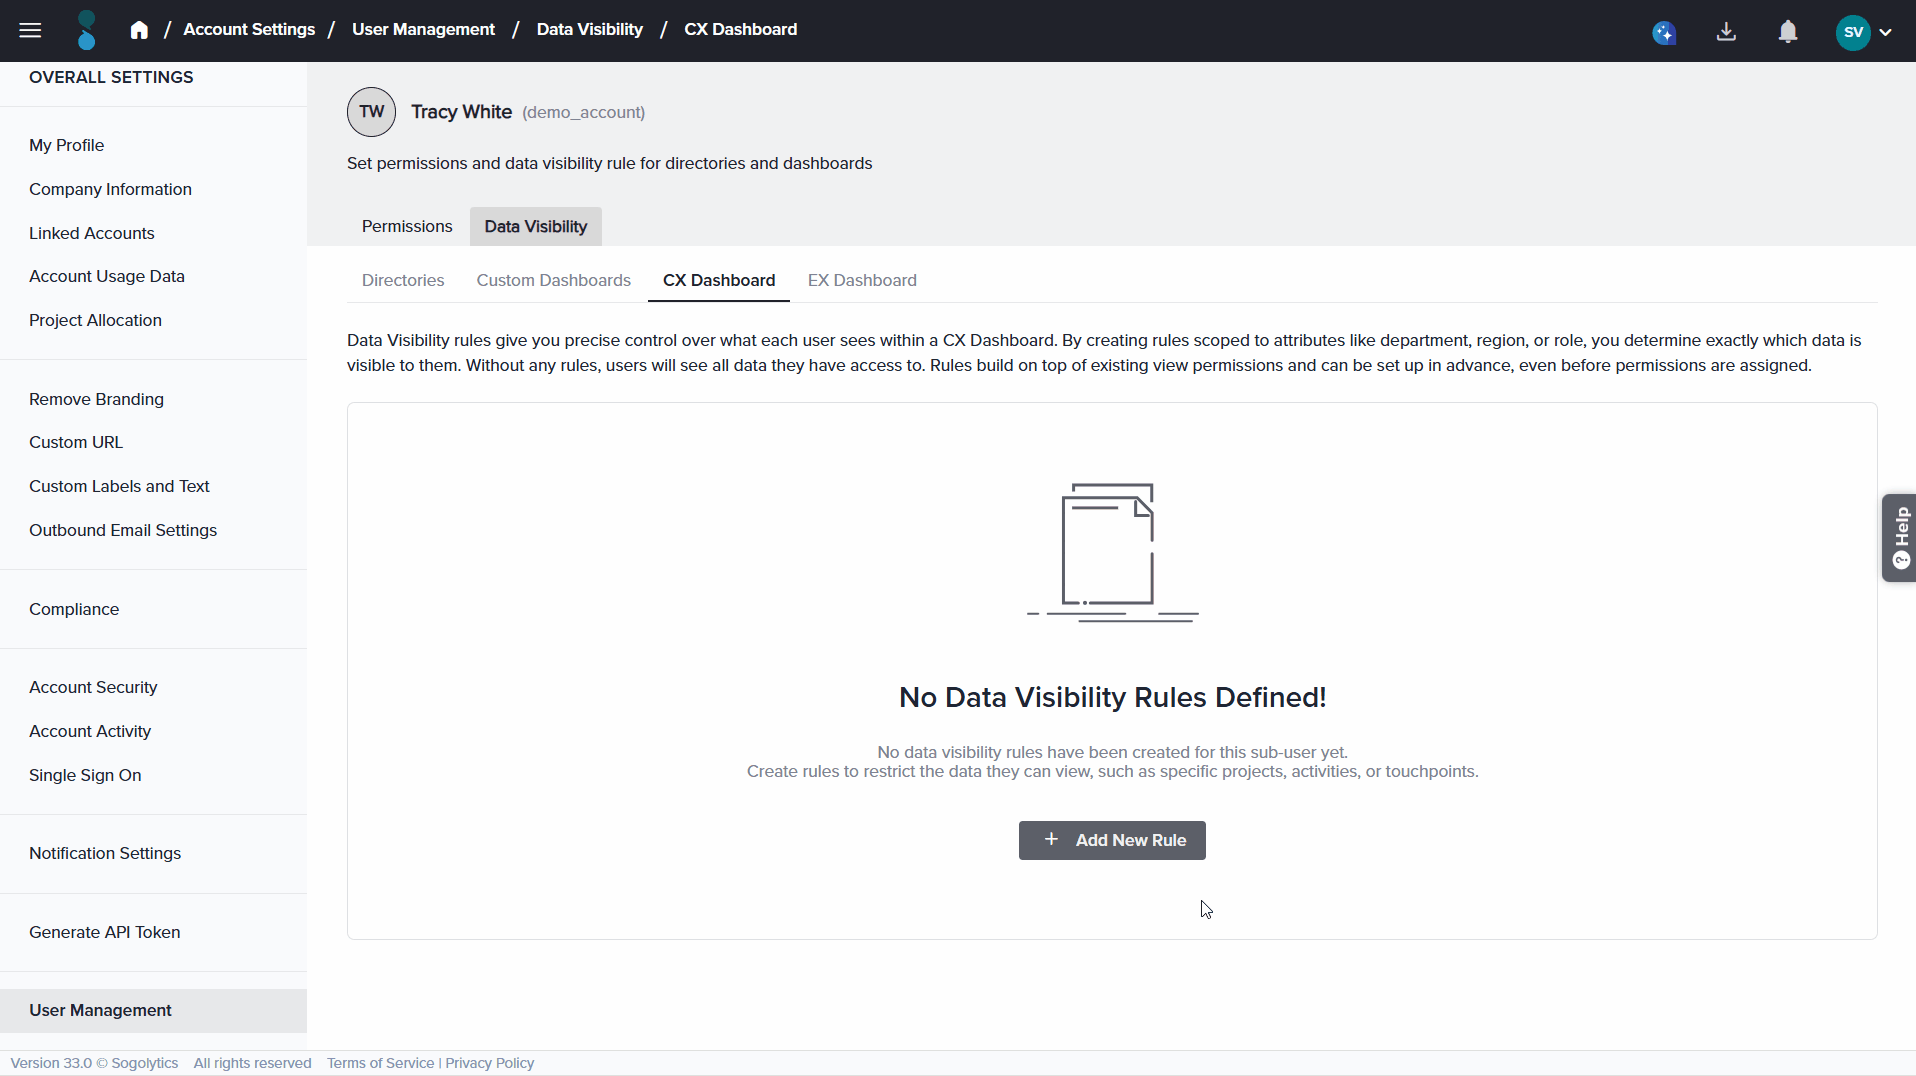
- Select the Data Visibility tab and across the top of this tab, you’ll see a row of sub-tabs — one for each area you can configure: Directories, Custom Dashboards, CX Dashboard, EX Dashboard.
- Select the area you want to configure, set the access options, and click Save or Save & Go Back. The updated permissions apply to the selected sub-user.
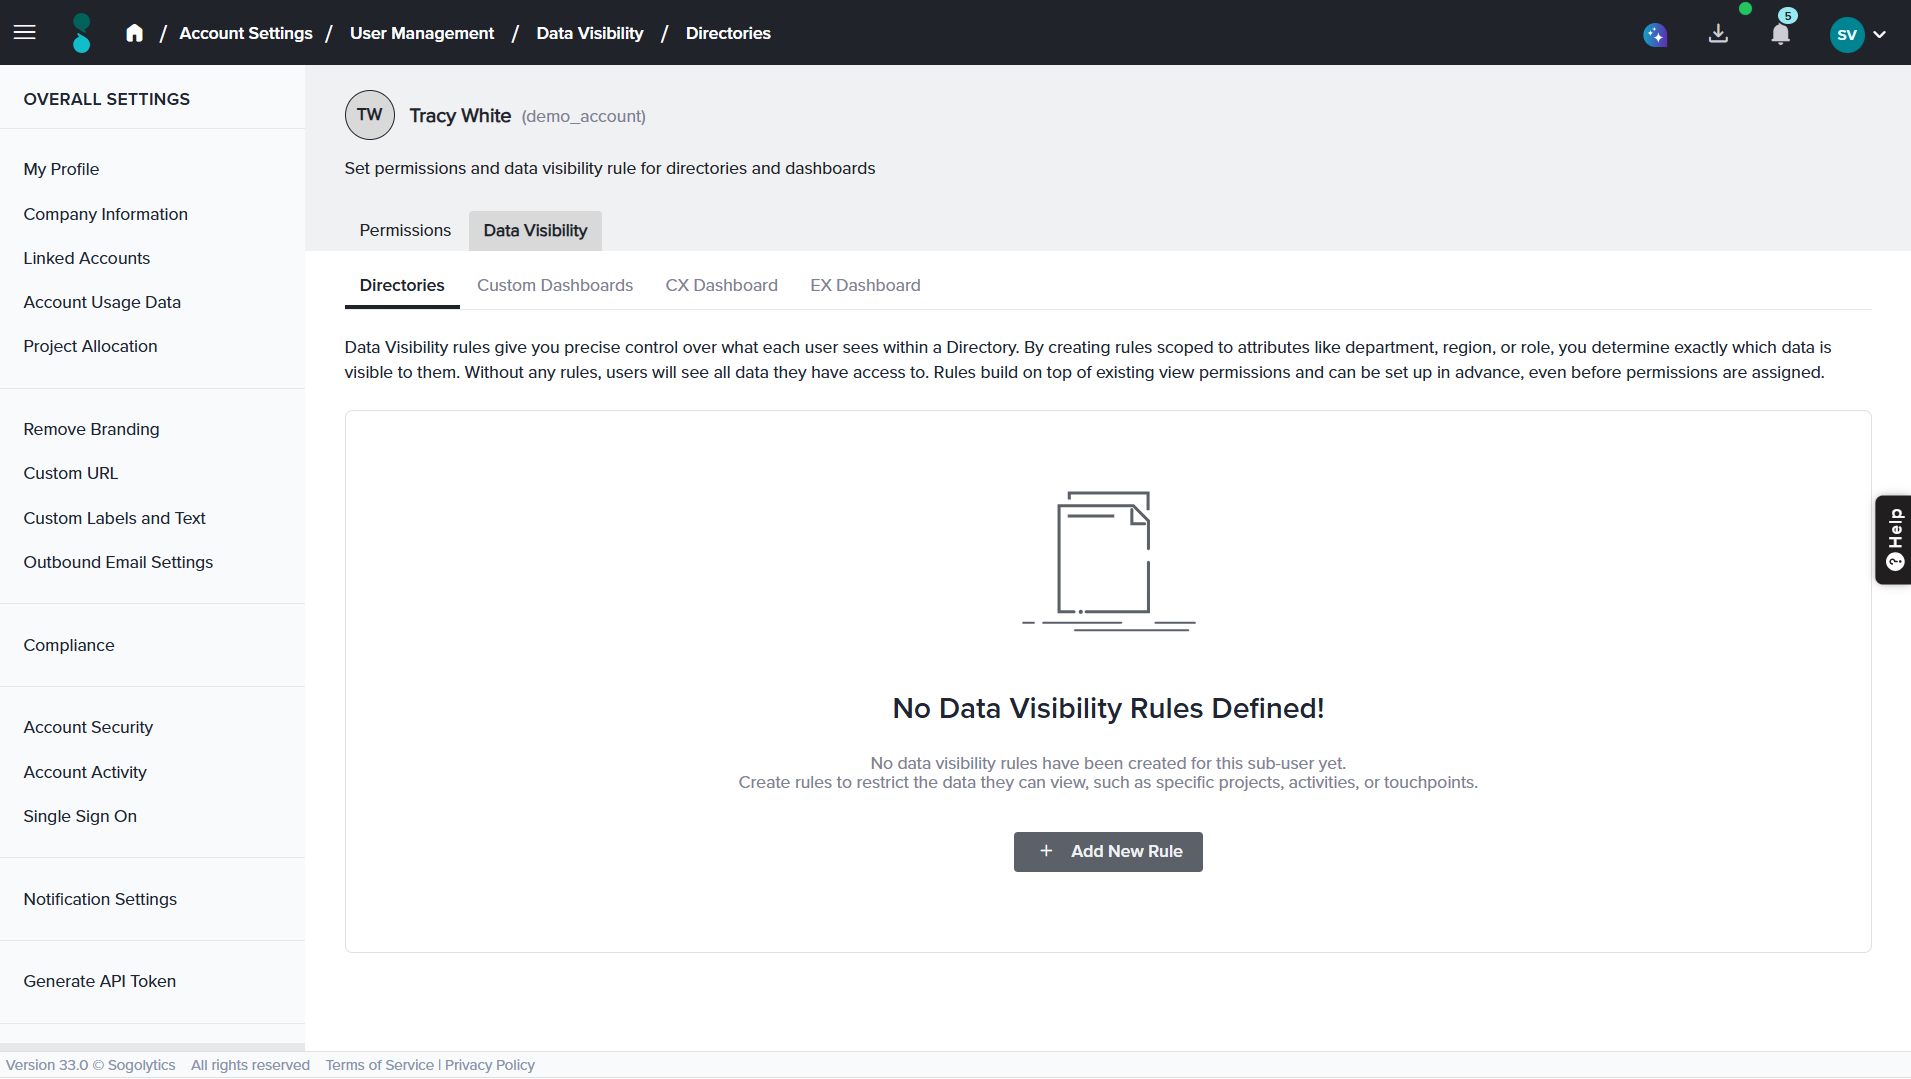
Understanding the Data Visibility Screen
The Data Visibility screen allows administrators to create and manage rules that restrict the information available to a sub-user. At the top of the page, four tabs are available:
- Directories: Controls which contacts and activities a user can view within a directory.
- Custom Dashboards: Controls which response data is displayed within Custom Dashboards.
- CX Dashboard: Controls which Customer Experience data is visible across CX Dashboards.
- EX Dashboard: Controls which Employee Experience data is visible across EX Dashboards.
When no rules have been created, the selected tab displays an empty state along with an Add New Rule button. Click Add New Rule to begin creating a visibility rule.
Creating a Data Visibility Rule for Directories
Directory Data Visibility Rules determine which contacts and activities a sub-user can access within a directory. When creating a rule, the user can choose to restrict visibility based on:
- Contacts only
- Activities only
- Both contacts and activities
After configuring the required conditions, click Save to create the rule. The visibility settings take effect immediately for the selected sub-user.
A regional manager is permitted to access the Banking Employee Directory but should only be able to view contacts belonging to specific branches. To achieve this, a Contact Visibility Rule can be created based on the Branch field.
In the example shown above, a Contact Visibility Rule has been applied to the Banking Employee Directory. The rule allows access only to contacts associated with the Binjiang Branch and Bedok Branch. The sub-user has also been granted permission to access this directory.
As a result, the sub-user can view only the contacts from these two branches within the directory. Any activities, responses, and records associated with contacts from other branches will remain hidden.
Data Visibility Rules for Custom Dashboards
Custom Dashboard Data Visibility Rules control which responses a sub-user can view within Custom Dashboards. Rather than creating separate dashboards for different users, administrators can use visibility rules to ensure that each user sees only the data relevant to their role.
When a visibility rule is applied, all dashboard widgets, charts, tables, and metrics are automatically filtered based on the defined conditions. This allows multiple users to access the same dashboard while viewing different subsets of data.
Visibility rules can be configured for:
- All Future Dashboards – Automatically applies the rule to all Custom Dashboards created in the future.
- Existing Dashboards – Applies the rule only to the selected dashboards that already exist within the account.
Custom Dashboard visibility rules can be based on the following criteria:
- Questions & Metadata: Displays responses collected for the specified questions and metadata.
- Projects: Displays responses collected through the selected project(s).
- Activity Fields: Displays responses associated with records that match the selected activity field criteria.
- Respondents: Displays responses submitted by the selected respondent(s).
- Feedback Recipients: Displays responses associated with the selected feedback recipient(s).
- Tags: Displays responses associated with the selected tag(s).
- NLP Conditions: Displays responses submitted only for the specified NLP Condition.
After configuring the required conditions, click Save to create the rule. The visibility settings take effect immediately for the selected sub-user.
A manager should only be able to view performance data for employees within their own team. To achieve this, a visibility rule can be created using the Feedback Recipient Directory Fields condition and selecting the employees who belong to that team.
As shown below, the administrator creates a rule that applies to both future dashboards and an existing Employee Performance Dashboard. The rule limits visibility to responses associated with three selected team members. When the sub-user opens the dashboard, all widgets and metrics are automatically filtered to display data only for those employees.
Data Visibility Rules for CX Dashboard
CX Dashboard rules control the Customer Experience data visible to a user. Rules apply across the entire dashboard and affect all dashboard tabs.
CX visibility rules can be based on the following criteria:
- Questions & Metadata: Displays responses collected for the specified questions and metadata.
- Projects: Displays responses collected through the selected project(s).
- Activity Fields: Displays responses associated with records that match the selected activity field criteria.
- Respondents: Displays responses submitted by the selected respondent(s).
- Feedback Recipients: Displays responses associated with the selected feedback recipient(s).
- Tags: Displays responses associated with the selected tag(s).
- NLP Conditions: Displays responses submitted only for the specified NLP Condition.
After configuring the required conditions, click Save to create the rule. The visibility settings take effect immediately for the selected sub-user.
The Banking team wants to monitor how both their mobile banking app and banking website are performing from the customer’s perspective. However, they want the App team and Website team to view only the results relevant to their respective channels.
To achieve this, they can create Data Visibility Rules based on Product Tags. In this example, the Product category contains two tags: Banking App and Banking Website.
In the example above, the Data Visibility Rule is configured for the Banking App tag. As a result, the sub-user assigned to this rule will only be able to view responses and data associated with the **Banking App** tag, and will not have access to data tagged as Banking Website.
Data Visibility Rules for EX Dashboard
EX Dashboard rules control the Employee Experience data visible to a user. Rules apply across the entire dashboard and affect all dashboard tabs.
EX visibility rules can be based on the following criteria:
- Questions & Metadata: Displays responses collected for the specified questions and metadata.
- Projects: Displays responses collected through the selected project(s).
- Activity Fields: Displays responses associated with records that match the selected activity field criteria.
- Respondents: Displays responses submitted by the selected respondent(s).
- Feedback Recipients: Displays responses associated with the selected feedback recipient(s).
- Tags: Displays responses associated with the selected tag(s).
- NLP Conditions: Displays responses submitted only for the specified NLP Condition.
After configuring the required conditions, click Save to create the rule. The visibility settings take effect immediately for the selected sub-user.
The manager wants the department heads to see the the negetive sentiments of employee engagement survey done for their team. In that case, the manager can choose to apply Data visibilty rules based on respondents and NLP Conditions.
In the above example we can see that the manager has created the rule to apply data visibility rules on the basis of the relevant project, respondents and the NLP Conditions. As a results of which only the responses related to the negative sentiments and the relevant team members (respondents selected on the basis of department) would be shown to the subuser.
Managing Existing Rules
Once a rule has been created, it can be managed directly from the rule list. The following actions are available for each rule:
- Edit the rule
- Delete the rule
- Reorder rules
- Enable or disable the rule using the On/Off toggle
Rule Priority
When multiple rules are configured, their order determines the priority in which they are evaluated. You can drag and drop rules to change their order. To ensure the correct rule is applied first, place more specific rules higher in the list and more general rules lower down.
A Report Viewer in the Banking account is assigned two Data Visibility Rules for the same Custom Dashboard:
- Rule 1 (more specific): Show responses where Branch = Binjiang Branch AND Product Tag = Banking App.
- Rule 2 (broader): Show responses where Branch = Binjiang Branch.
Because rule order determines precedence, the administrator drags Rule 1 above Rule 2 so the most specific condition is evaluated first.
As a result, when the sub-user opens the dashboard, the system first applies the narrower Binjiang Branch + Banking App rule, then layers in the broader Binjiang Branch rule — ensuring the sub-user sees exactly the intended slice of data without the broader rule unintentionally widening their access.
If the order were reversed — with the broader Rule 2 placed on top — the wider Branch-only condition would take effect first, and the sub-user could end up seeing more data than intended.
Best Practices
- Create Data Visibility Rules before granting access permissions.
- Use meaningful and descriptive rule names.
- Keep conditions as simple as possible.
- Review rule priority whenever multiple rules exist.
- Validate visibility settings before assigning users to production environments.
Related Articles
Subscribe for tips and insights to drive better decisions!

